Understanding the Warp Tool In Photoshop
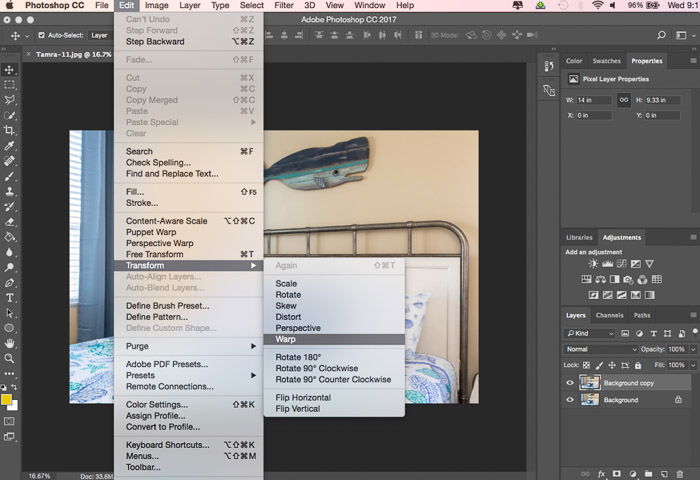
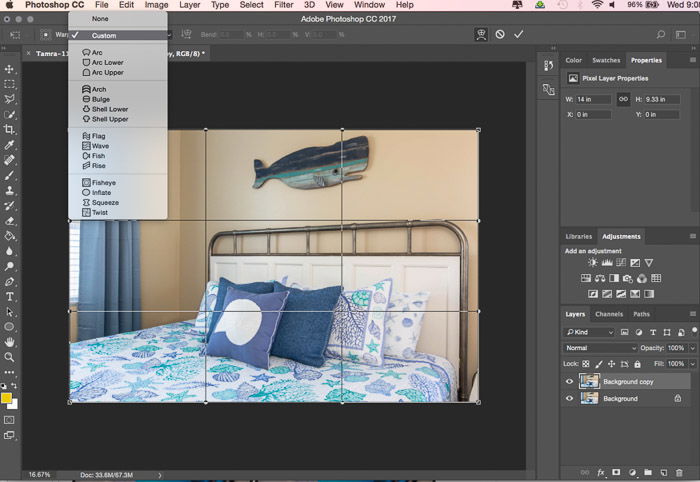
Photoshop’s warp tool lets you do just that – warp an image. You can take a selection and drag to reshape it however you want. The warp tool can be accessed by going to Edit at the top of the screen, then selecting Transform, and then Warp. You can also access it by clicking Ctrl+T on a PC or Command+T on a Mac. Then right-click on PC or control-click on a Mac for the menu and select Warp. A grid appears over your selection, whether it’s the entire image or just part of it. You can then click and drag along any line of the grid or any point on the edge of the grid to start warping. Once you begin to warp, you’ll notice that the four corner points have handles you can grab to farther warp. The warp tool also has a list of handy automated shape options built into it! You can access these from the pull-down menu at the top of the Photoshop screen while in the warp tool mode. It’s important to note that none of the Transform tools will work on the Background layer. You need to first create a duplicate layer to do the work on or double click on the Background to turn it into a regular layer.
When Should I Use the Photoshop Warp Tool?
You may never really need to use the warp tool, and that’s okay! It really comes down to the type of photography that you do and what your editing process typically entails. We all do some degree of editing to our photos, and the warp tool can be used for dramatic changes or subtle tweaks. The warp tool is ideal for adding in objects realistically and subtly. It’s also ideal for portraits where you want to make small retouches to slim someone down or minimize features. The key is to use the warp tool minimally so that your final photo still looks realistic. Let’s take a look at a few examples of how to warp in Photoshop!
Warpping Text
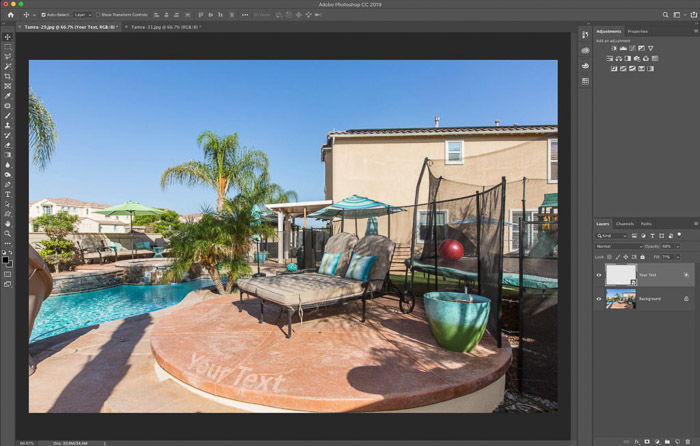
If you’re inserting branding into a photo or adding in an element of text, the warp tool allows you to shape it to whatever surface it’s on. For added realistic effect, you can then blend the layer for texture. In the example below, I dropped in text to mimic the edge of the step and then blended the layer to add the same texture of the stone. What sort of subjects might call for this? Imagine replacing text on a graffiti wall or on posters with your own custom text. Or changing out one logo or brand name for another. Customizing a sign to have someone’s name on it. Warping text can really open up creative possibilities!
Adding New Elements
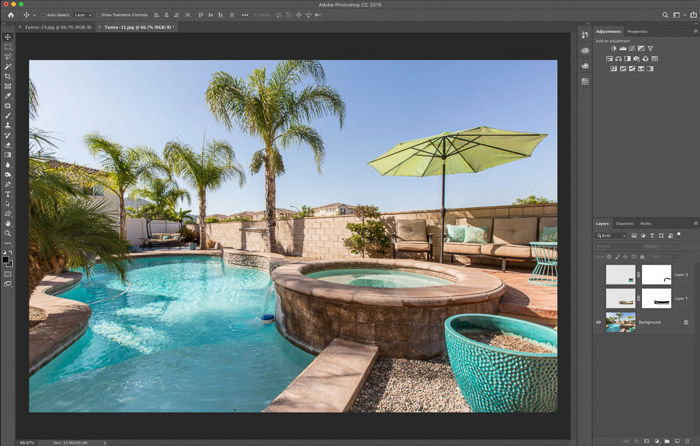
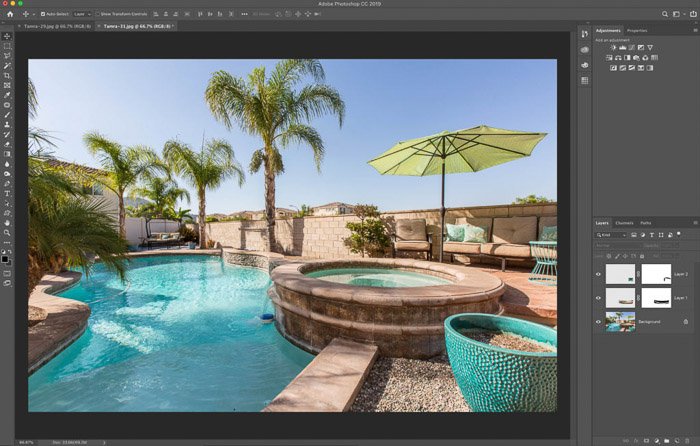
Sometimes you want to replicate an element in a photo, but cloning it just won’t be realistic enough. Rather, copy the additional element on to its own layer and warp it to fit your need. This helps to make it look more realistic, natural, and it also gives you more editing control. Below, I added in an extra stone trim on the hot tub wall. To do this I copied the top ledge and pasted it as a new layer. That new layer was then warped to fit the shape needed, which was slightly more tapered than the trim at the top. Any edges that needed to be cleaned up were taken care of with a layer mask.
Portrait Retouching
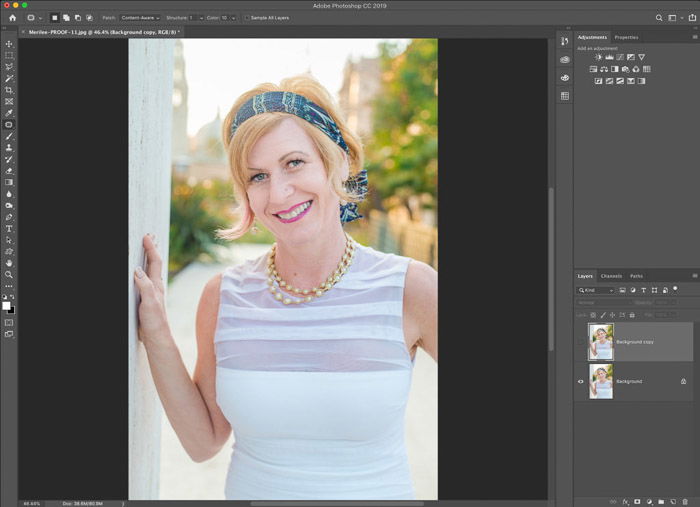
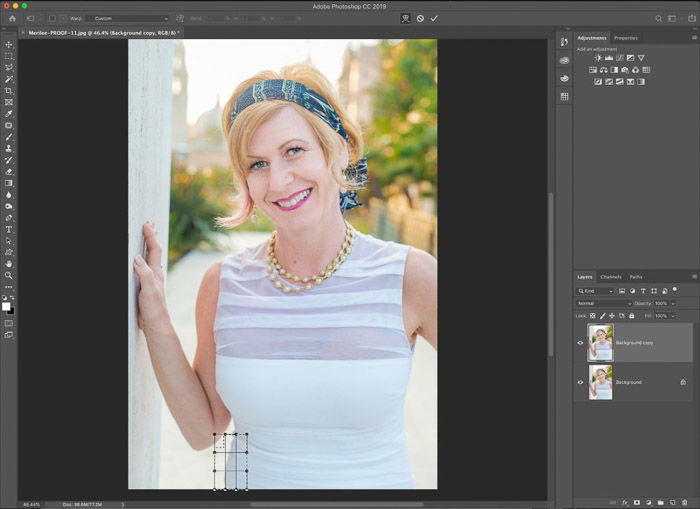
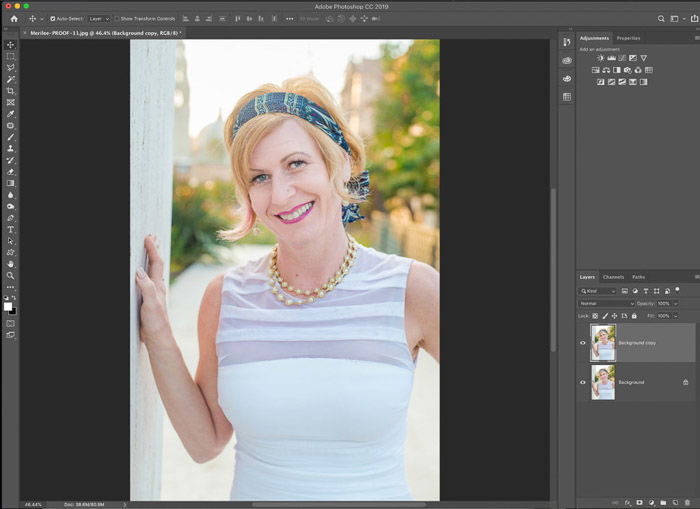
Perhaps one of the most common uses for the warp tool is in retouching portraits. Whether you’re adding more of something or slimming something down, it’s the ideal tool for subtle changes with big impact. Below I show an example of a portrait where we slimmed the love handles a bit and moved up part of the neckline of the shirt. Especially when warping a body shape, you want to keep in mind that small changes make a big difference. By working on a duplicate layer for the warping, you can easily turn that layer off and compare to the original. This way, you can make sure you haven’t changed the body shape too much.
Conclusion
The warp tool in Photoshop is a handy option to have at your disposal, but it may not be one that you use daily. For those working with commercial clients or portraits, it would be a great tool to use for realistic-looking retouching. For the rest of us, it may just be a fun photoshop tool to play with from time to time!