In this article, I will give you a short introduction to the use of short and broad lighting styles.
What Does Broad Lighting and Short Lighting Mean?
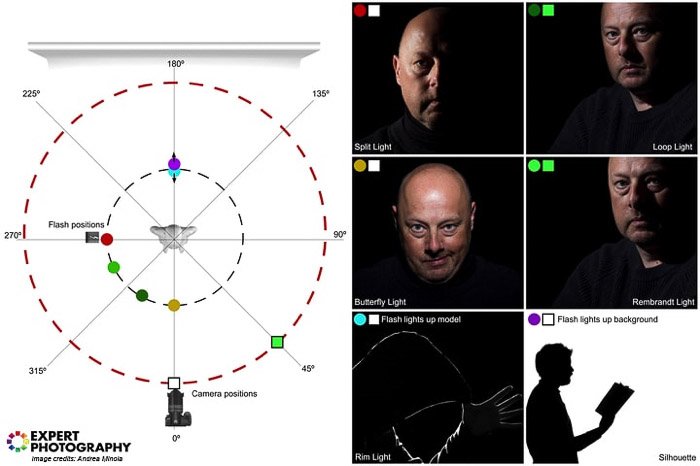
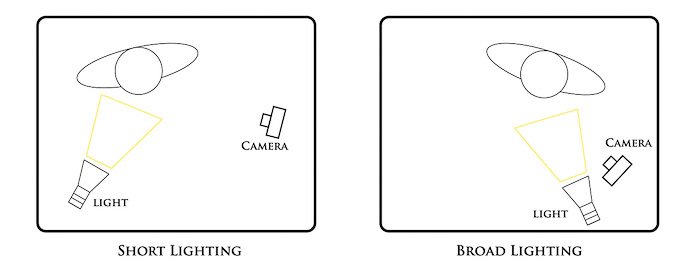
When it comes to face lighting, people tend to consider broad and short light as photography lighting setups. But to me they are more a style, completing the chosen lighting setup. To make it simple, think of a lighting setup as the way you place your studio lights relative to your model’s nose. A frontal light looking down at the model will create a shadow under the model’s nose. Because this shadow resembles a butterfly, the setup is called butterfly light. Many other portrait lighting setups are named after the pattern of the shadows they create on the model’s face. With the lights in place, the position from where you frame your model defines whether you are using a broad or a short light. Broad light is when you frame your portrait so that the brighter side of the model’s face is closer to the camera.
With short light, the darker side of your model’s face is the one closer to the camera.
The schemes below illustrate the basic short and broad lighting setups.
How Do Broad and Short Lights Affect Your Portraits
The lighting setup determines the pattern of the shadows across the model’s face. The use of broad or short lights defines how dominant the shadows are in the image. Let’s look at some general aspects of these two styles.
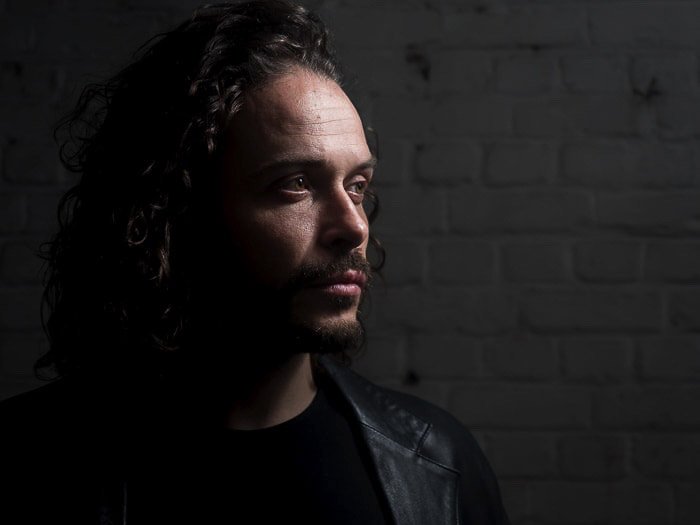
Short Light
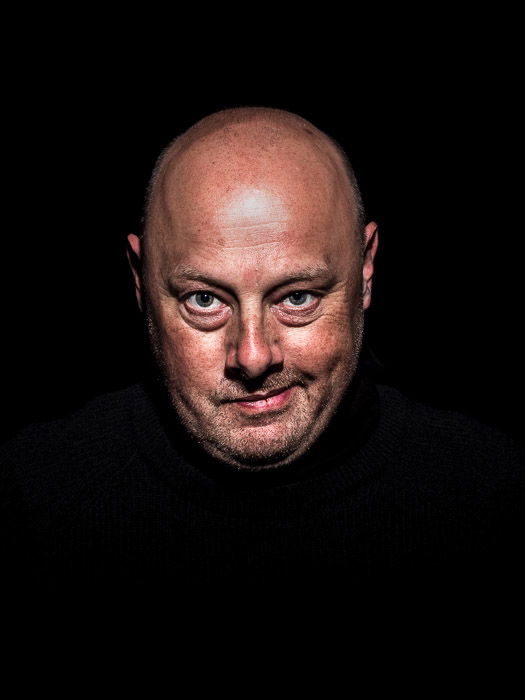
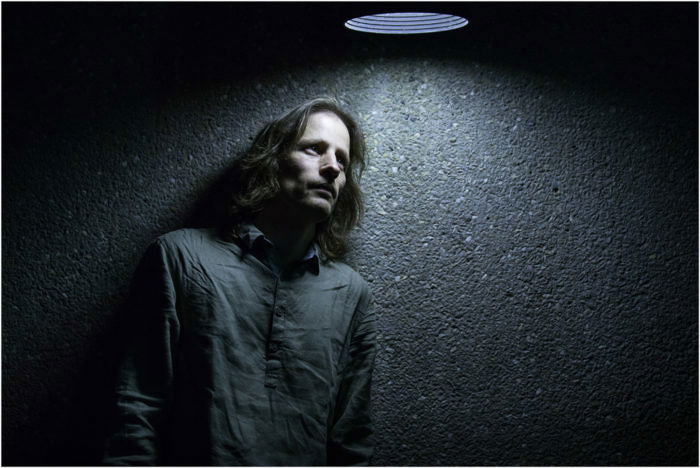
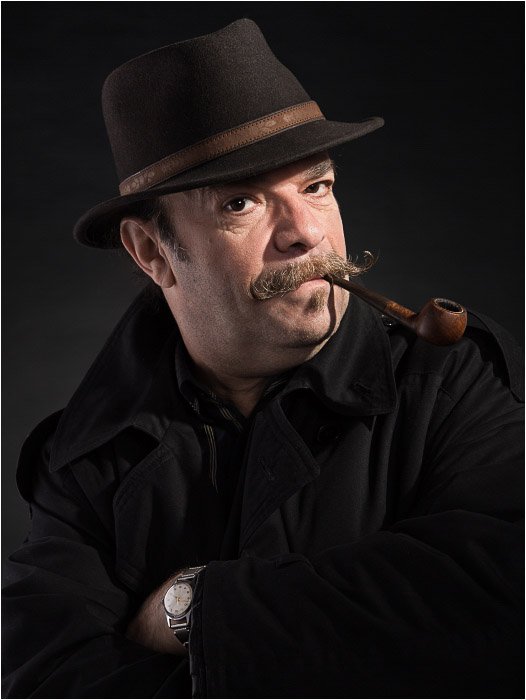
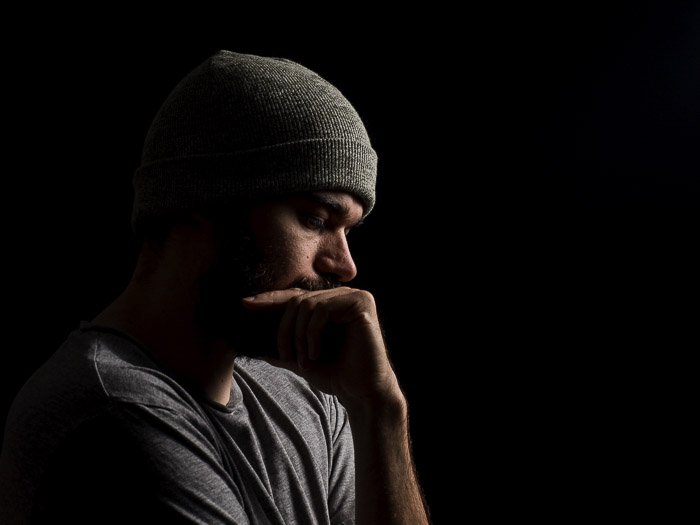
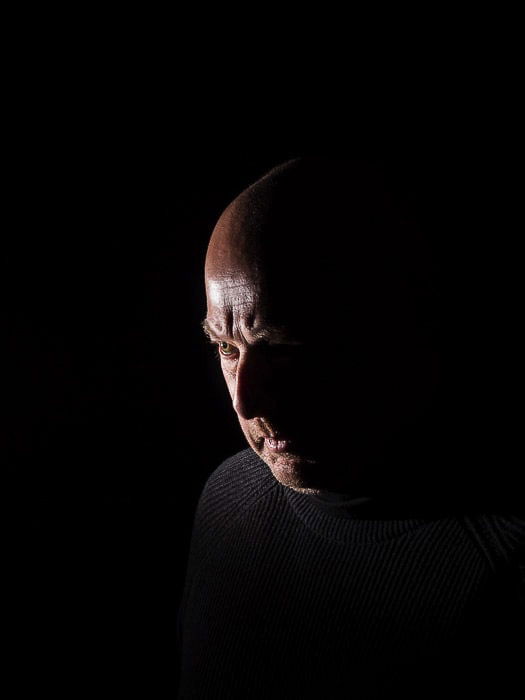
With short lighting, the shadows are more important. The darker side of the model’s face is predominant in the photo. Shadowed faces will reveal more features than lighted ones. This will add a 3D feeling to the image. Shadows are a key element in creating dark and moody portraits. Short light also makes the model’s face appear longer and slender. With models whose face is wide, round, or heavy, you can use short lighting to visually slim it down. A less flattering side effect of a short light is that skin imperfections become more visible. Generally speaking, because short light enhances skin textures, it suits male models better.
Since short light enhances facial wrinkles, it is a style you should consider when taking portraits of elder people. With elderly people, in fact, the more obvious the wrinkles, the more charismatic and interesting they look.
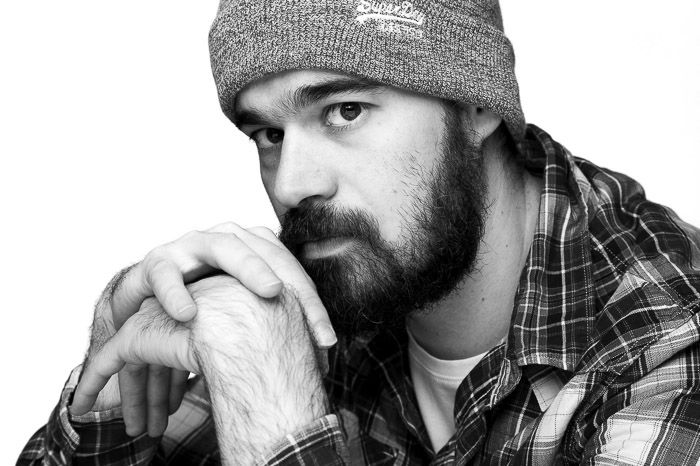
Broad Light
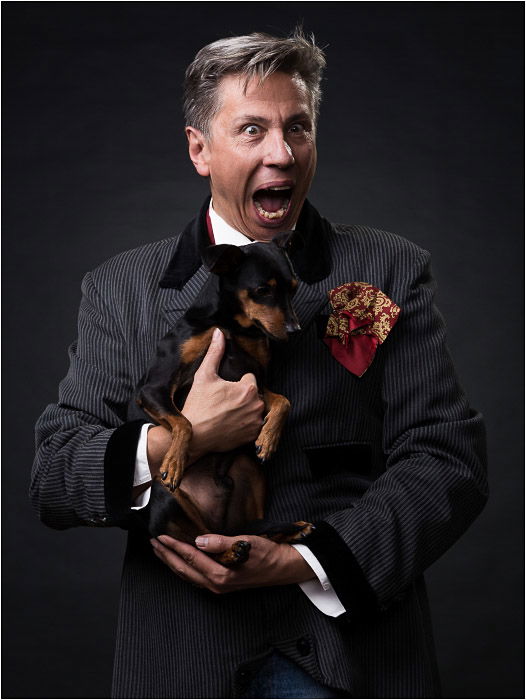
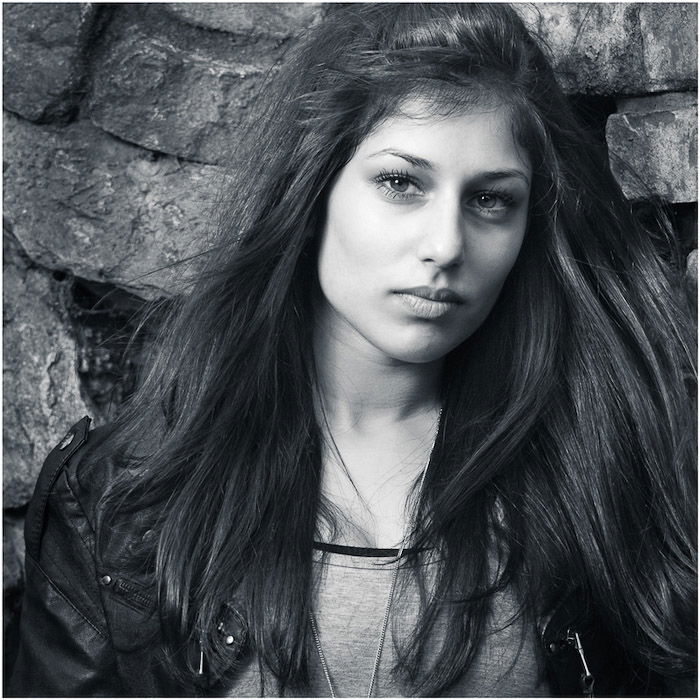
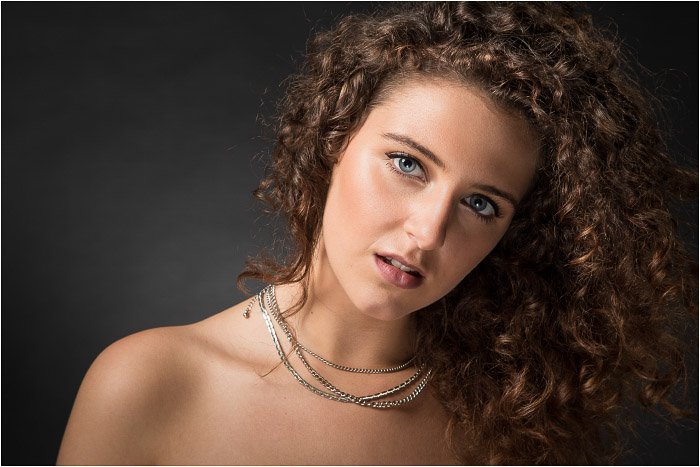
With broad lighting, you are creating a portrait with a brighter mood than images shot using short light. Broad light makes the model’s face appear larger. If your model has a very thin face, broad light is usually a better choice than Short Light. Also, the flat light will help smooth out wrinkles and other skin imperfections. For this reason, broad light is often used with female models. Finally, you can use broad light to hide larger imperfections, such as scars or other defects, in the darker side of your model’s face.
How to Manipulate Broad and Short Light for a Different Look
There are several factors that affect the way broad and short light styles will look like:
The facial features of your subject (e.g., prominent cheekbones, nose, etc.); the kind of light scheme used; the distance of the light from the subject (i.e. light fall off); the quality of the light (i.e. hard or soft); the amount and position of fill light; your position with respect to the lighting setup.
A split lighting setup with a single light source will create the most dramatic effects. By adding a fill light, you will get a more balanced image and subtle broad or short light effect.
How to Use Broad and Short Lighting With Natural Light
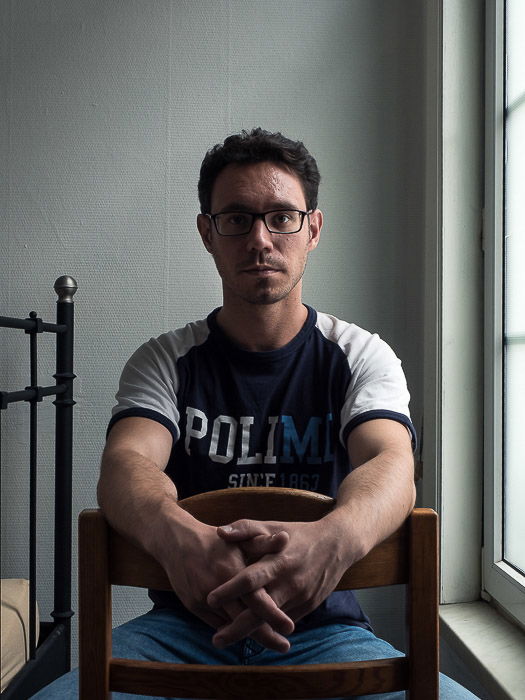
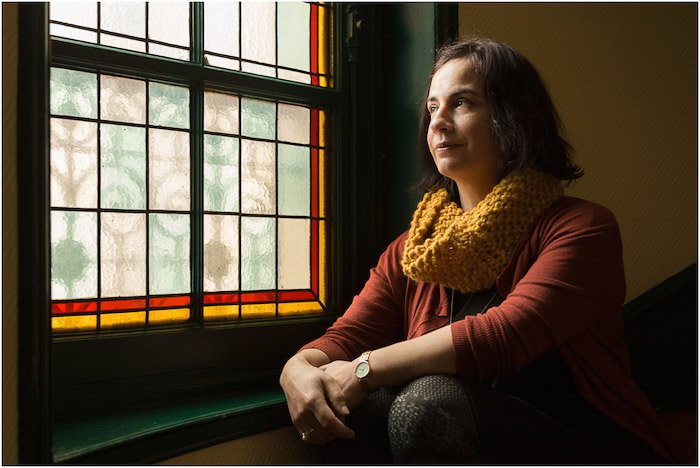
Until now, we have looked at how to use broad and short lights in the studio. It’s easier to control the light using studio lights or flashguns. But everything we said works just as well with natural light. A simple way to use natural light is to place the model next to a large window in the shade. It is best to avoid using windows in direct sunlight. This is because they let harsh light in. By using a large window and tuning the model away from it, you can control the light quality. You can choose whether the light will be hard or soft. With the use of a simple reflector, you can create most of the classic setups presented before. Have your model face the window at an angle. This makes it easy to use Rembrandt light with the short lighting style.
Conclusion: Street Photography Quotes
You have the choice of whether to use broad or short light styles in portrait photography. Depending on the look you want to achieve, either broad or short light will be better. It is a simple, but fundamental, element in the creation of the image. Broad and short light work well with your overall lighting setup to set the mood of the image. They can also visually alter how the model looks like. The next time you are shooting portraits, whether using artificial or natural light, remember that not all compositions are created equal. Keep in mind which style will give better results. Why not check out our posts on using soft focus or wedding flash photography next!

title: “How To Use Short And Broad Lighting In Portrait Photography” ShowToc: true date: “2023-02-15” author: “Walter Snyder”
In this article, I will give you a short introduction to the use of short and broad lighting styles.
What Does Broad Lighting and Short Lighting Mean?
When it comes to face lighting, people tend to consider broad and short light as photography lighting setups. But to me they are more a style, completing the chosen lighting setup. To make it simple, think of a lighting setup as the way you place your studio lights relative to your model’s nose. A frontal light looking down at the model will create a shadow under the model’s nose. Because this shadow resembles a butterfly, the setup is called butterfly light. Many other portrait lighting setups are named after the pattern of the shadows they create on the model’s face. With the lights in place, the position from where you frame your model defines whether you are using a broad or a short light. Broad light is when you frame your portrait so that the brighter side of the model’s face is closer to the camera.
With short light, the darker side of your model’s face is the one closer to the camera.
The schemes below illustrate the basic short and broad lighting setups.
How Do Broad and Short Lights Affect Your Portraits
The lighting setup determines the pattern of the shadows across the model’s face. The use of broad or short lights defines how dominant the shadows are in the image. Let’s look at some general aspects of these two styles.
Short Light
With short lighting, the shadows are more important. The darker side of the model’s face is predominant in the photo. Shadowed faces will reveal more features than lighted ones. This will add a 3D feeling to the image. Shadows are a key element in creating dark and moody portraits. Short light also makes the model’s face appear longer and slender. With models whose face is wide, round, or heavy, you can use short lighting to visually slim it down. A less flattering side effect of a short light is that skin imperfections become more visible. Generally speaking, because short light enhances skin textures, it suits male models better.
Since short light enhances facial wrinkles, it is a style you should consider when taking portraits of elder people. With elderly people, in fact, the more obvious the wrinkles, the more charismatic and interesting they look.
Broad Light
With broad lighting, you are creating a portrait with a brighter mood than images shot using short light. Broad light makes the model’s face appear larger. If your model has a very thin face, broad light is usually a better choice than Short Light. Also, the flat light will help smooth out wrinkles and other skin imperfections. For this reason, broad light is often used with female models. Finally, you can use broad light to hide larger imperfections, such as scars or other defects, in the darker side of your model’s face.
How to Manipulate Broad and Short Light for a Different Look
There are several factors that affect the way broad and short light styles will look like:
The facial features of your subject (e.g., prominent cheekbones, nose, etc.); the kind of light scheme used; the distance of the light from the subject (i.e. light fall off); the quality of the light (i.e. hard or soft); the amount and position of fill light; your position with respect to the lighting setup.
A split lighting setup with a single light source will create the most dramatic effects. By adding a fill light, you will get a more balanced image and subtle broad or short light effect.
How to Use Broad and Short Lighting With Natural Light
Until now, we have looked at how to use broad and short lights in the studio. It’s easier to control the light using studio lights or flashguns. But everything we said works just as well with natural light. A simple way to use natural light is to place the model next to a large window in the shade. It is best to avoid using windows in direct sunlight. This is because they let harsh light in. By using a large window and tuning the model away from it, you can control the light quality. You can choose whether the light will be hard or soft. With the use of a simple reflector, you can create most of the classic setups presented before. Have your model face the window at an angle. This makes it easy to use Rembrandt light with the short lighting style.
Conclusion: Street Photography Quotes
You have the choice of whether to use broad or short light styles in portrait photography. Depending on the look you want to achieve, either broad or short light will be better. It is a simple, but fundamental, element in the creation of the image. Broad and short light work well with your overall lighting setup to set the mood of the image. They can also visually alter how the model looks like. The next time you are shooting portraits, whether using artificial or natural light, remember that not all compositions are created equal. Keep in mind which style will give better results. Why not check out our posts on using soft focus or wedding flash photography next!
