In Photoshop, you can drag and drop an overlay onto your image. This will instantly take your photos to the next level. In this article, I’ll show you how to start with Photoshop Overlays. [ExpertPhotography is supported by readers. Product links on ExpertPhotography are referral links. If you use one of these and buy something, we make a little bit of money. Need more info? See how it all works here.]
What Are Photoshop Overlays?
An overlay is an image that is added to your photo as an extra layer. Photoshop Overlays can create an extra dimension or add texture to your photos. Decades ago, when Photoshop didn’t exist, photographers tried to add similar effects. They overexposed images and scratched negatives with pins or other rough materials. Today, you can apply an Overlay in a matter of minutes. Just drag, drop, and adjust blending mode and opacity to create a subtle effect.
Where to Find Overlays
Photoshop Overlays are available all over the internet. There are websites offering Overlays for sale. A lot of other websites also offer Overlays for free.
How to Use Photoshop Overlays
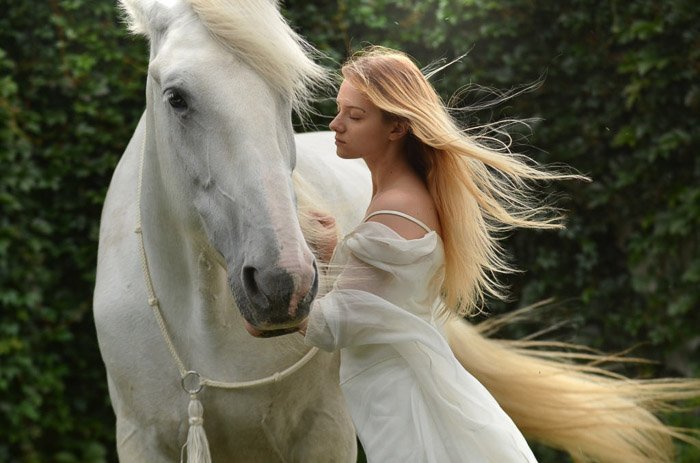
Photoshop Overlays are very easy to use. They are images themselves so you don’t have to install them or put them in special folders. You can save Overlays anywhere you want. I’ll use a Photoshop Overlay to simulate a dreamy light effect. From this:
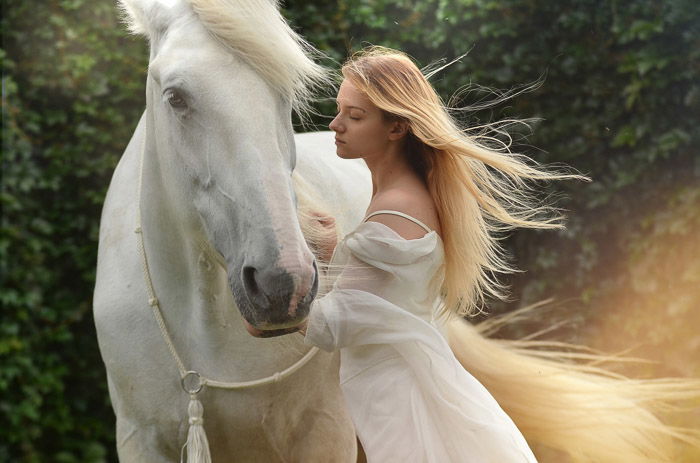
To this:
You can download the same free Overlay that I’ve used for this example, here.
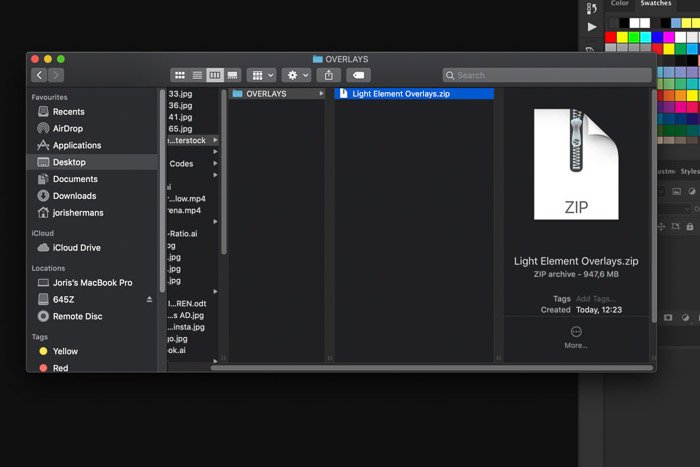
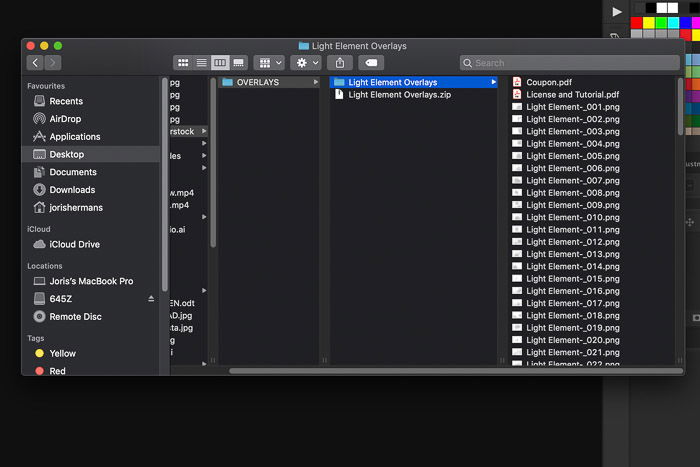
Step 1: Save and Unzip
Save the Overlay file to an easy-to-find location on your computer. Usually, it’s a .zip file.
Find the file on your computer and double click to unzip.
Step 2: Open a Photo
Find a photo that you think needs a Photoshop Overlay effect. For this example, a dreamy portrait or a sunset picture will work best. Open your photo in Photoshop.
Step 3: Add the Photoshop Overlay
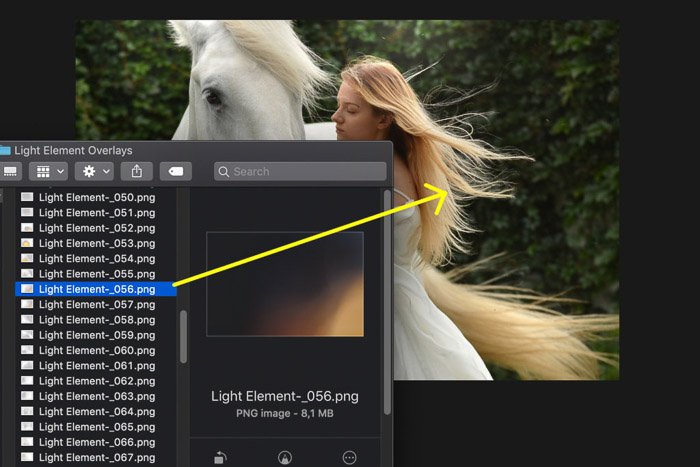
Open the folder where you’ve saved the Overlays file and unzip it. Find an Overlay you like and drag and drop it onto the photo.
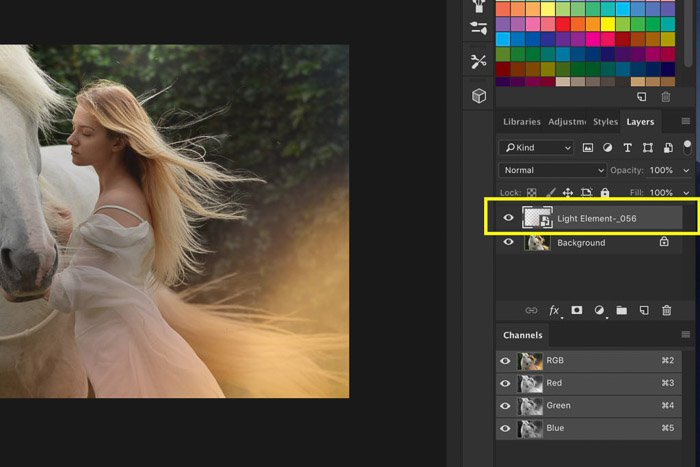
It will automatically appear in a new layer.
Resize or reposition if needed and double click on the photo to confirm. I’ve used two Overlays on top of each other for this example.
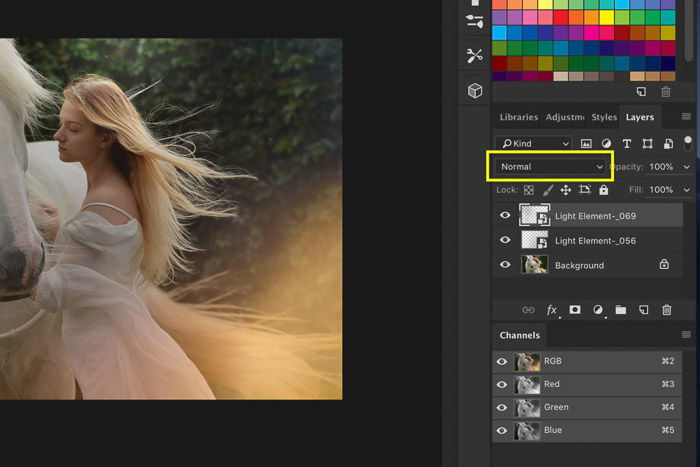
Step 4: Change Blending Mode
We need to change the blending mode of the Overlay layers to blend the effect nicely with the photo.
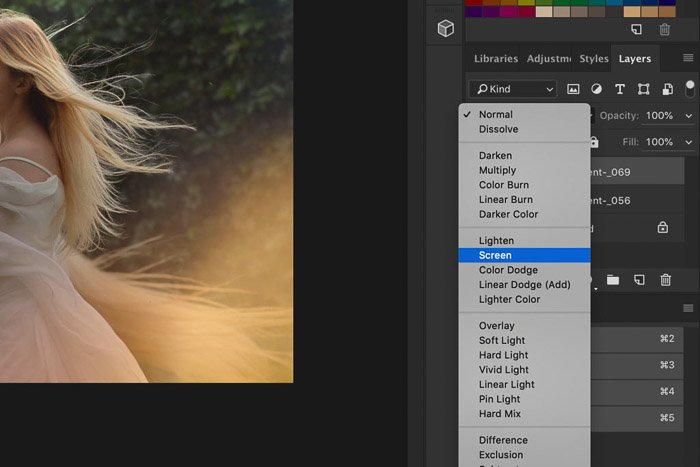
Click on the Blending Mode dropdown menu and select “Screen”.
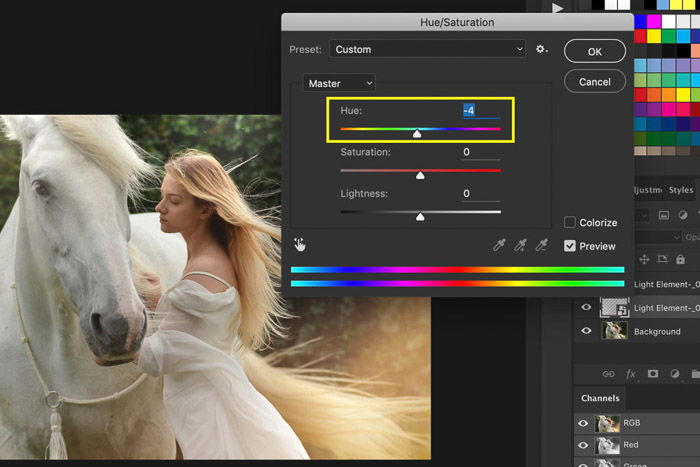
Step 5: Change the Color of the Overlay
It looks good already but sometimes, you might want to change the color of the Overlay to make it match better with your photo. It depends on your background colors. Select a layer with an Overlay. Go to Image > Adjustments and select “Hue/Saturation…”. A new window will appear. Drag the Hue slider to the left or right to change the color of the Overlay.
You can also drag the other sliders to adjust the saturation or change the lightness of the Overlay. Experiment with the sliders to see what works for you. Now, save the photo and that’s it. Here’s the result.
Conclusion
A Photoshop Overlay is the easiest and fastest way to add a special effect or extra dimension to your photos. You can try light effects, rain or mist effects, textures, and much more. Drag and drop as many Photoshop Overlays onto your photos until you get the desired look.