Unless you use a tilt-shift lens, you’re always going to end up using Photoshop Lens Correction. And this nifty filter is useful for more than just architecture photography. Here are the basics.
How to Use the Photoshop Lens Correction Filter
There are basically two ways to use Photoshop Lens Correction. You can let Photoshop do the corrections automatically. The problem is that you don’t have any control. So, the alternative is to do it manually. First, let’s look at automatic settings.
1. Auto Correction
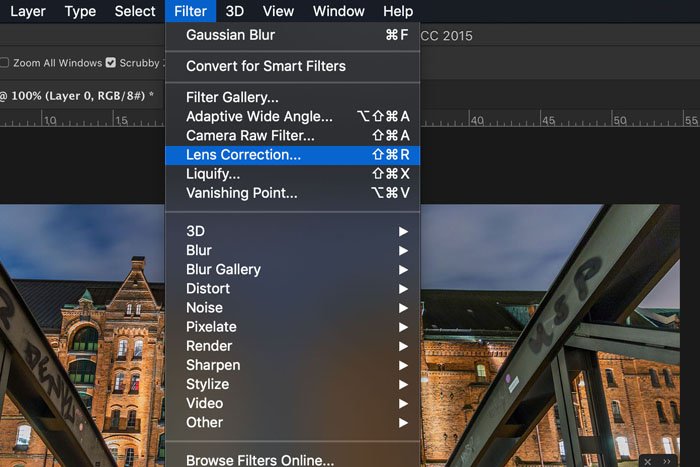
Step 1: Open Lens Correction in Photoshop
Open the photo that you want to correct. Go to Filter in the top menu and select “Lens Correction”.
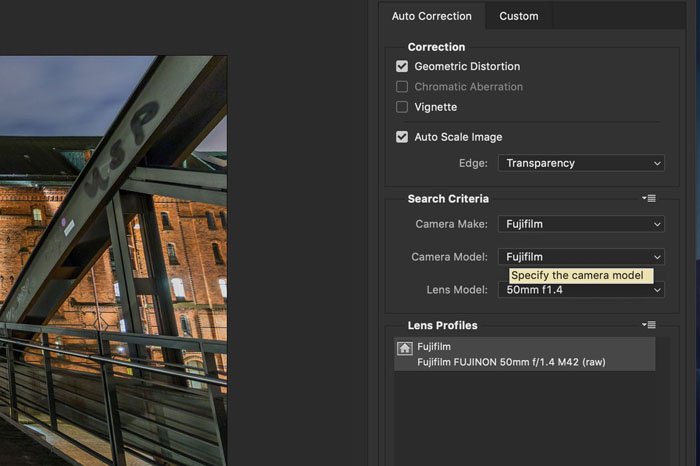
Step 2: Camera Model
Simply check the “Geometric Distortion” box and check if Photoshop picked the right lens and camera model.
Photoshop has access to the metadata of the image and matches it with presets from the Adobe Lens Correction database of cameras and lenses. Unless you have a very obscure camera brand, Photoshop will find it.
2. Manual Correction
Now, let’s correct an image manually. You can correct photos taken too close to the subject with a wide angle lens and straighten lines. You can even use it for faces. To start, select the Custom tab.
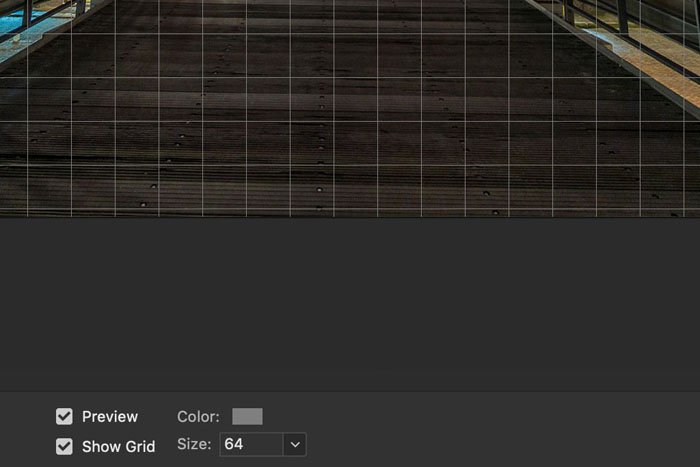
Step 1: Straighten the horizon
Turn on the grid at the bottom of the Lens Correction window. You can also change the color of the grid and how far the lines are apart from each other. The grid will help you check if all the lines in your image are straight.
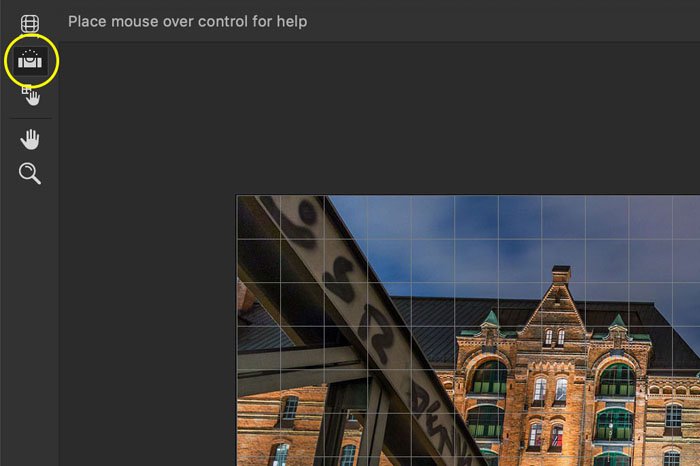
Select the Straighten tool from the toolbar on the right.
Click and drag across the image to define a horizon. Photoshop will straighten the photo automatically.
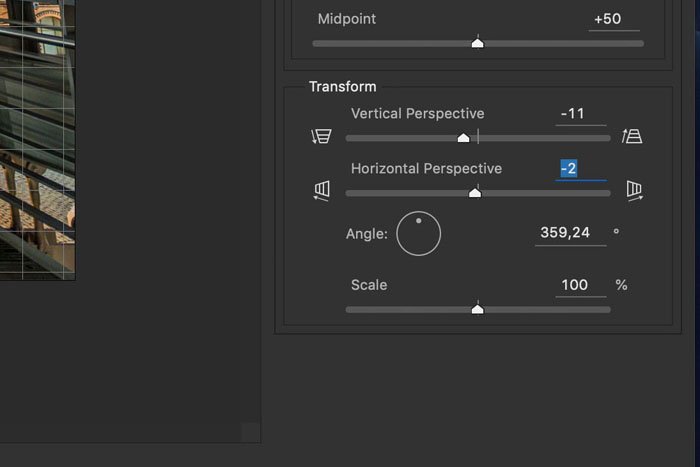
Step 2: Correct the Perspective
Use the sliders in the Transform section to correct the perspective. Start with the vertical and horizontal perspectives.
Then, change the Angle to counter a diagonal distortion and use Scale to see more or less of the image.
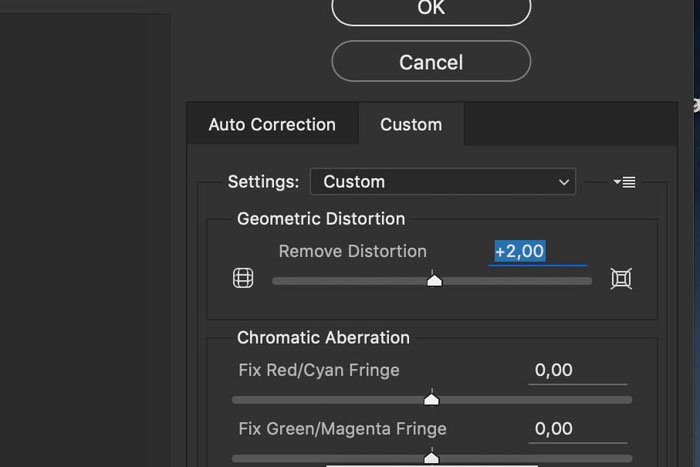
Step 3: Remove Distortion
A common problem is that an image bulges. The horizon and also vertical lines arc slightly. You can correct this with the Geometric Distortion slider. You can also use this slider when you’ve taken a photo of a face with a wide-angle lens.
You can also use the Remove Distortion tool and drag across the image. It has the same effect as the sliders. I find the sliders a bit more comfortable and accurate.
Step 4: Remove Chromatic Aberration
Some lenses suffer from chromatic aberration more than others. You’ll notice color fringing around the edges of high contrast areas like treetops against the sky. Depending on the color, use one of the sliders. Make sure to zoom in so you can see everything in detail.
Step 5: Remove Vignette
A vignette usually appears when taking a photo with the lens wide open. Darkening of the image appears towards the edges. Use the Vignette sliders to lighten up the edges.
Conclusion
The Photoshop Lens Correction filter is a great tool. But try not to over-rely on it though. When taking photos, make sure you have the right lens for the job. The better your image is straight out of the camera, the easier it is to correct distortions. If the distortions are really bad, they might be beyond repair. Check out our tips on avoiding Photoshop mistakes, using distortion tools or free Photoshop plugins next!


title: “How To Use Photoshop Lens Correction Filter Step By Step " ShowToc: true date: “2023-02-13” author: “Julie Hamilton”
Unless you use a tilt-shift lens, you’re always going to end up using Photoshop Lens Correction. And this nifty filter is useful for more than just architecture photography. Here are the basics.
How to Use the Photoshop Lens Correction Filter
There are basically two ways to use Photoshop Lens Correction. You can let Photoshop do the corrections automatically. The problem is that you don’t have any control. So, the alternative is to do it manually. First, let’s look at automatic settings.
1. Auto Correction
Step 1: Open Lens Correction in Photoshop
Open the photo that you want to correct. Go to Filter in the top menu and select “Lens Correction”.
Step 2: Camera Model
Simply check the “Geometric Distortion” box and check if Photoshop picked the right lens and camera model.
Photoshop has access to the metadata of the image and matches it with presets from the Adobe Lens Correction database of cameras and lenses. Unless you have a very obscure camera brand, Photoshop will find it.
2. Manual Correction
Now, let’s correct an image manually. You can correct photos taken too close to the subject with a wide angle lens and straighten lines. You can even use it for faces. To start, select the Custom tab.
Step 1: Straighten the horizon
Turn on the grid at the bottom of the Lens Correction window. You can also change the color of the grid and how far the lines are apart from each other. The grid will help you check if all the lines in your image are straight.
Select the Straighten tool from the toolbar on the right.
Click and drag across the image to define a horizon. Photoshop will straighten the photo automatically.
Step 2: Correct the Perspective
Use the sliders in the Transform section to correct the perspective. Start with the vertical and horizontal perspectives.
Then, change the Angle to counter a diagonal distortion and use Scale to see more or less of the image.
Step 3: Remove Distortion
A common problem is that an image bulges. The horizon and also vertical lines arc slightly. You can correct this with the Geometric Distortion slider. You can also use this slider when you’ve taken a photo of a face with a wide-angle lens.
You can also use the Remove Distortion tool and drag across the image. It has the same effect as the sliders. I find the sliders a bit more comfortable and accurate.
Step 4: Remove Chromatic Aberration
Some lenses suffer from chromatic aberration more than others. You’ll notice color fringing around the edges of high contrast areas like treetops against the sky. Depending on the color, use one of the sliders. Make sure to zoom in so you can see everything in detail.
Step 5: Remove Vignette
A vignette usually appears when taking a photo with the lens wide open. Darkening of the image appears towards the edges. Use the Vignette sliders to lighten up the edges.
Conclusion
The Photoshop Lens Correction filter is a great tool. But try not to over-rely on it though. When taking photos, make sure you have the right lens for the job. The better your image is straight out of the camera, the easier it is to correct distortions. If the distortions are really bad, they might be beyond repair. Check out our tips on avoiding Photoshop mistakes, using distortion tools or free Photoshop plugins next!
