I still remember the panic rising in my throat after taking my first formal group photo. It was a team photo for a local sports program. And the back row turned out blurry. I had no idea why. I’ve since learned that the answer is both a camera focus trick and a lesson in aperture. [ExpertPhotography is supported by readers. Product links on ExpertPhotography are referral links. If you use one of these and buy something, we make a little bit of money. Need more info? See how it all works here.]
Two Lessons to Take Large Group Photos with Everyone in Focus
Focusing your camera for a group photo doesn’t involve any special equipment. You need the typical gear for group and family photos. But it’s essential to understand what depth of field and aperture are.
Depth of Field
Depth of field means how much of the image is in focus… The section of the image that’s in focus is called the focal plane. The focal plane is perpendicular to the camera. It runs in a straight, horizontal line in the photograph. A narrow depth of field has a focal plane just a few centimeters long, like a piece of ribbon. Everything on that imaginary piece of ribbon is in focus. But anything beyond is out of focus. A wide depth of field has a focal plane that’s a few meters wide, like a sidewalk. So everything standing on that road or sidewalk is in focus. Of course, it’s much easier to fit a group of people on a road than on a piece of ribbon. This means you need a wide focal plane for a sharp group photo. The distance that matters for the depth of field is each person’s distance from the camera. Someone can be standing a few feet to the left of the first person and still be in focus. They are the same distance from the camera, standing on that sidewalk. But put that person a few feet behind or in front of the first, and that distance will often throw them out of focus. They’re no longer in the focal plane.
Aperture
Photographers mainly control how much of the image is focused using aperture settings. With a wide aperture, like an f-stop of f/1.8, perhaps a few centimeters of the image are in focus. The rest is nicely blurred. Think of the ribbon-width focal plane from the previous section. That wide aperture is what creates that popular, soft background in portraits. But the depth of field at f/1.8 is so small that the eyes may be in focus, but the nose isn’t. New photographers often assume that a wide aperture is best for a group portrait. But if the aperture is so wide that the eyes are in focus and the nose is not, how can you get a dozen pairs of eyes sharply focused? You can’t!
Use a Narrow (Small) Aperture
Photographing a group requires a wide enough depth of field. This means a narrow enough aperture to keep every individual in the image within that in-focus range. If the depth of field is a few meters instead of centimeters, you can capture the entire group. Leave the blur for the background. Increase the aperture to a number like f/8. By changing it from f/1.8 to f/8, the focal plane changes from that ribbon to a sidewalk. This makes it much easier to get a sharp group shot. Aperture is one of the biggest mistakes in bad group photos. But setting a higher aperture isn’t the only aspect of depth of field or getting a sharp image. If you set up poses right, you can still get that soft portrait background while getting the group in sharp focus. So here’s how to get all your ducks in a row and get everyone in focus.
How to Take Large Group Photos With Everyone in Focus
Here are seven steps to make sure your focus is spot on for big groups of people.
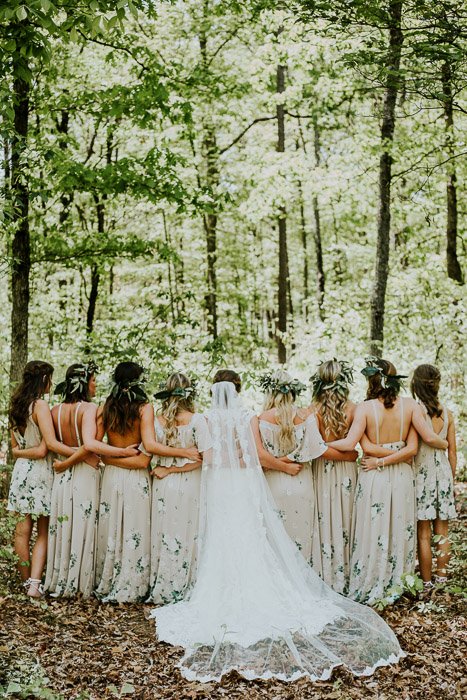
1. Direct the Group to an Area Away From the Background
Group photography requires narrower apertures than when photographing a single person. But what if you still want the background to be blurred? Use distance instead of aperture to create that background blur. Set up in a location that allows the group to be far from the background. If the group leans against a brick wall, that wall will be in focus. The farther the group is from that background, the softer the background will appear. The backdrop can be a wall, a studio backdrop, or a row of trees at the park. Of course, you have to balance that distance out with the composition. The background may not be large enough to get the group 100 meters away. But as you set up, keep both composition and the distance from the background in mind.
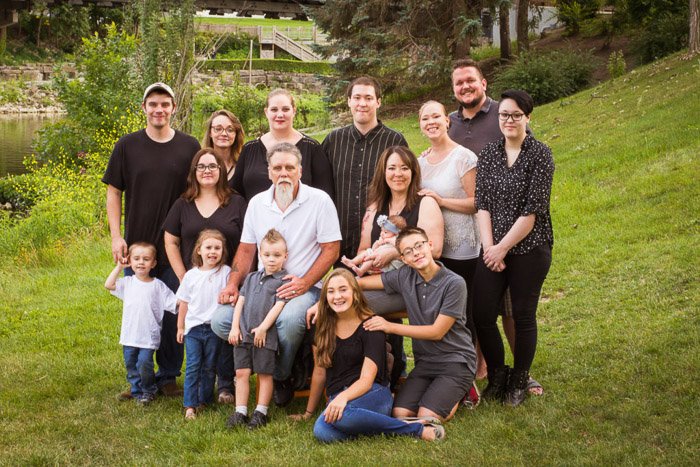
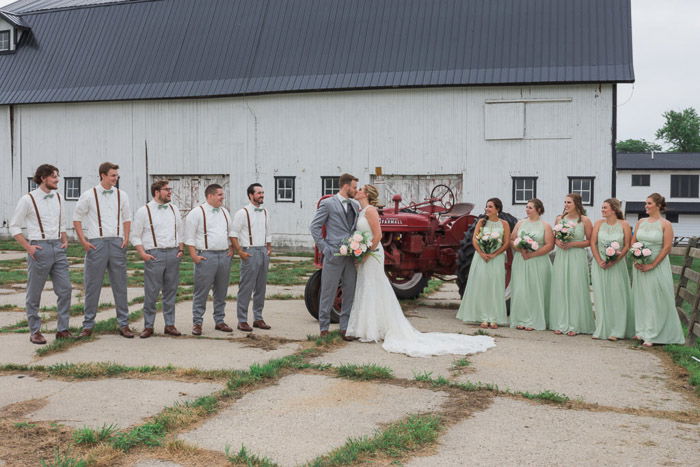
2. Pose the Group With Depth in Mind
The farther away the group members are, the harder it is to get the entire group in focus. So the easiest way to get an entire group focused is to pose them in a single line. And then, make sure everyone is the same distance from the camera. While that’s great for small groups, larger groups need layers to fit everyone in the image. There’s nothing wrong with using a few layers to get everyone in. But as you create the different layers, ask everyone to stay as close as possible. Don’t have two meters of extra space between rows one and two. Ask the second row to get as close as possible to the first row.
3. Have Your Group Back Up (if Possible)
Ever notice how macro photos tend to have very little in focus? The closer you are to the subject, the narrower that focal plane is. The farther you can stand from the group, the more focused the group will be without adjusting the aperture. Of course, there isn’t always room to back up or a lens long enough to make that distance possible. But as you shoot, keep in mind that shooting from a bit farther away helps keep the group focused.
4. Set a Narrow Aperture (Smaller F-stop Number)
Next, set your camera’s aperture to one narrow enough to keep everyone in focus. Use Aperture Priority mode or Manual mode on your camera. (If you need a refresher, read our post on shooting modes.) The “right” aperture depends on whether you have different rows or if everyone is standing parallel to the camera. The distance between the group and the camera lens also affects it. I start at an f/8 for group photos. I then adjust the aperture based on how the image is set up. But sometimes, I’m photographing a small group. And they’re all standing the same distance from the camera. In that case, I lower the f-stop number. If I’m trying to photograph a huge group of 50 people? That aperture may be set higher, at f/11 or more. Remember, the aperture also affects how light or dark the image is. If an f/8 aperture is too dark, try getting everyone in a single row. Or try standing farther from the group to drop the aperture and get everyone in focus. Or use a flash to add more light to the scene.
5. Use Single-Point Autofocus and Find the Right Person to Focus On
The focal point you use in-camera doesn’t start at the front of the focal plane (that ribbon or sidewalk). When you set the focal point, that point is a third of the way into the focal plane. That means a third of the focal plane is in front of that point, and two-thirds are behind that point. The camera will have some distance in front of and behind that point in focus. If you place the focal point in the wrong spot, you lose some of that focal plane to empty space. Set your camera’s autofocus mode to single-point autofocus. This mode allows you to move the focal point around with the arrows on the back of your camera to choose where to focus. For portraits, always place the focal point over an eye. For group portraits, avoid placing the focus point on someone at the edges of the frame. The sharpest focus comes from the center focal points. If you have a group of two rows or less, place the focal point on a person’s face in the center of the first row. While part of the focal plane is in front, more is behind that focal point. Focus on the first row for small groups. For groups of three or more, focus on a face closest to one-third of the way through the group. Focus on a face in the middle row in a group with three rows.
6. Focus and Shoot
With the group arranged and the focal point set, press halfway to focus and then fully press to take the image. Burst mode can be helpful for groups. It has nothing to do with focus, though. It has everything to do with avoiding closed eyes.
7. Check the Photo and Troubleshoot
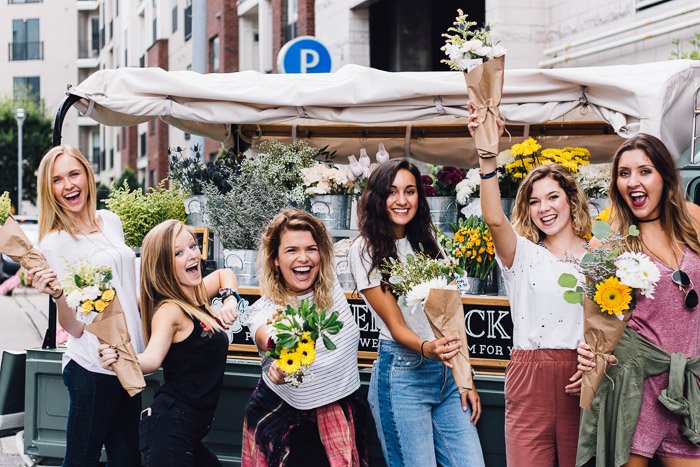
While you’re learning, check the shot before the group moves. See if you need to adjust any settings to get everyone in focus. In your camera’s image preview, zoom in to look at each row and see if everyone is in sharp focus. Don’t rely on a three-inch preview image to judge the sharpness without zooming in. If the group isn’t focused, you may need to increase your aperture or step farther away from the group. Or double-check that you placed the focal point on a face towards the front third of the group. If the background is sharp, you may be able to step down the aperture or arrange the group farther from the background. Be sure to also check for posing errors too. People at the ends may move closer to the camera, creating a curve instead of a straight line. This can throw them out of focus if the aperture isn’t wide enough. If you’re shooting a candid group photo? Remember that people may move slightly as they laugh or interact. Err on the side of a narrower (higher f-stop number) aperture.
Conclusion
By understanding camera focus systems, depth of field, and focal planes, you can take a sharply focused group photo… no matter how many people are in front of your camera! Capturing a sharp group photo is a mix of aperture, camera focus modes, and setting up that photo. Capturing a sharp group photo starts with setting up the pose with distance in mind:
Between the group members Between the group and the background Between the group and the camera
If you set up the group far enough from the background, you can get a group photo with a nice, soft background. And a narrow aperture is often essential to maintaining that sharpness. Remember to place the focal point on a face in the front third of the group. It can be tricky to take large group photos with everyone in focus. But capturing a team, family, or colleagues together can preserve group dynamics long after the moment ends.
![]()
![]()

![]()
![]()
