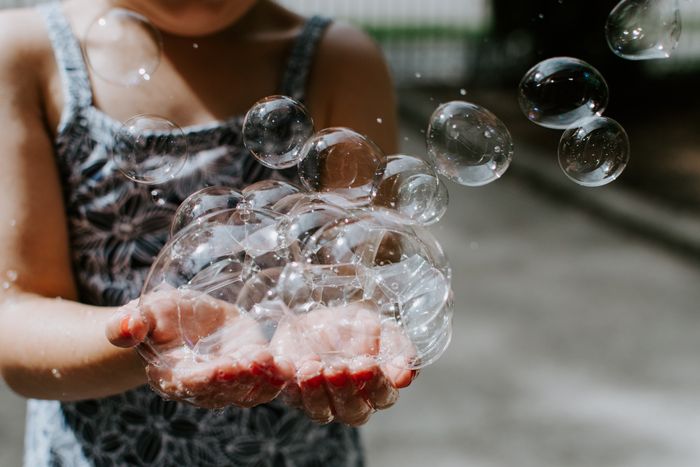
So how do you photograph soap bubbles? Don’t worry, taking pictures of bubbles is surprisingly easy. And since you get to be like a kid again, you’ll inevitably enjoy this project.
9. How to Make Perfect Soap Bubbles for Bubble Photography
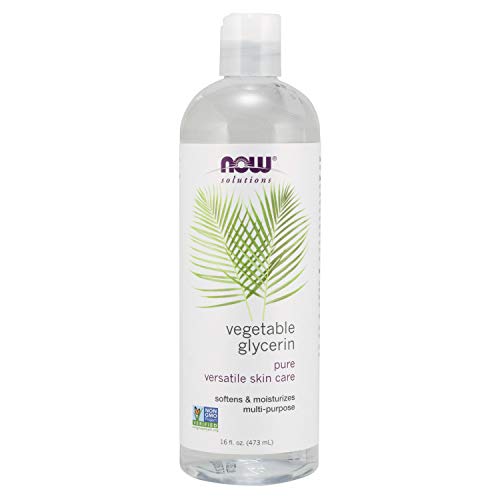
To be successful in bubble photography, you’ll have to learn how to make strong soap bubbles. You’re free to use regular soap. However, it’s highly likely that its bubbles will quickly burst while you’re shooting. To improve the lifespan of your sphere, you’ll need to create your own soap solution for the project. First, add two tablespoons of liquid soap (hand soap or dishwashing liquid) into a half cup of water. Next, mix a few drops of glycerine into the container and leave it for a few hours. Glycerine is what gives the bubbles strength and makes them last longer. You can usually purchase it at local drug stores or even cake shops. Alternatively, you can also buy a small bottle of bubble solution. They’re available in your favourite supermarket’s toy aisle. And they last just as long as your home-made solution. If you can’t find separate bottles, get a bubble toy and use the liquid inside it, instead.
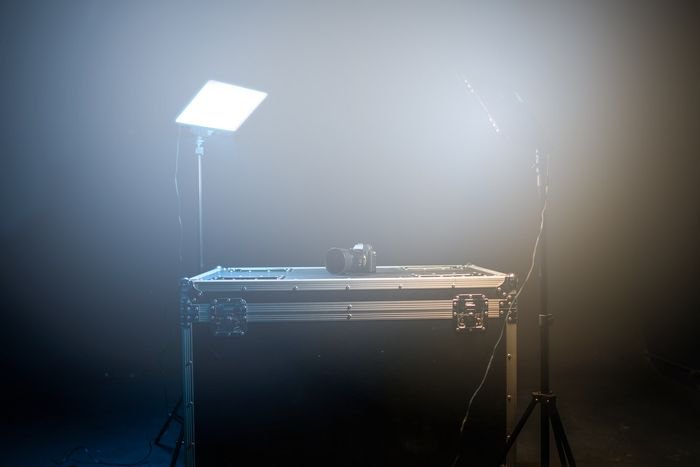
8. Set up a Desktop Studio
For consistent results, you’ll need to set up a little studio indoors. The good thing is you don’t necessarily have to buy top-notch professional equipment to do it. In fact, all you need is a table, a tripod, a background, and a light source. First, arrange your table next to a wall. Then, tape your background (preferably black construction paper or cloth) against the wall and let it roll over the counter. Now, all you have to do is place a tripod in front of your set-up, and you’re done. Check out our article on shooting with minimal gear for some tips. Alternatively, you can buy a mini studio online for only 20 dollars. It’s already complete with different backgrounds and even includes a set of mini lights. It also lets you light your subject from different directions. This should give you plenty of shooting options.
7. Set Up Your Lighting
Once you finish your studio, then it’s time to install lights around it. There are many ways to illuminate your soap bubbles. Of course, the best option is employing a professional softbox and a beauty dish. These types of light sources diffuse the light evenly and give you consistent results. You can use an external flash unit to provide adequate light to your image. Fit it with a diffuser and set it on a mini tripod. Then, you can use white cardboard to let the light bounce off the flash unit and on to your subject. You can also use LED panel lights if you have them. They’re not only portable, but they also don’t get too hot, unlike other light sources. If you don’t have any of the items mentioned above, you can always light your studio with just a regular lamp. Make sure you have one with an adjustable neck, so it shines directly above the bubble. Then tape wax paper on its hood to help diffuse the light. Just remember to turn it on only when you’re taking photographs. Otherwise, the paper might get too hot and potentially burn. It’s crude, and it’s not the most ideal method, but it works.
6. Choose the Right Lens for Bubble Photography
You’ll be taking close-up images, so it would be best to use a macro lens. If you don’t have one, you can buy a macro attachment for your regular lens, instead. It could be in the form of extension tubes, bellows, or reversal rings. They’re affordable, and they mount seamlessly on to your lens. Alternatively, you can use a telephoto lens. You’ll have to be relatively far from your subject, but it lets you take close-up photos, nonetheless. If you don’t have a telephoto, your kit lens would suffice. Just extend it until you reach the maximum focal length. It should be about 55mm or 85mm, depending on the brand. It effectively functions as a telephoto lens so it helps you zoom in at a reasonable distance. Unfortunately, using a regular lens doesn’t guarantee that you will be able to shoot your subject close enough. To offset this potential issue, you can create bigger bubbles, instead.
5. Stabilize Your Camera
Since you’ll be taking macro pictures of bubbles, you’ll need to stabilize your camera. The best way to do this is by setting up your device on a tripod. Depending on the lens you have (a telephoto, macro, or kit lens), you’ll have to adjust your distance until the bubble looks big enough in your frame. It will also help a lot if you use a remote to trigger your device hands-free. Doing so ensures that you don’t introduce unnecessary issues while shooting. Apart from motion blur, you could also easily throw off your focus when you touch your camera. If you don’t have remote, you could use your self-timer, instead. Set it to two seconds and wait until the shutter clicks. However, you should only use this as a last resort since this method isn’t time-efficient. Keep in mind that bubbles only last for so long until they pop.
4. Find the Right Settings
By nature, close-up shots have a narrow depth of field. This means only a part of the image will be in focus, while the rest is blurry. To ensure that your bubble images are sharp, use a small aperture between f/11 and f/16. The deep focus these narrow apertures produce allows you to photograph the entire circumference of the soap bubble. Meanwhile, shutter speed settings mainly depend on the strength of your light source. If you’re using strobe lights or a powerful flash unit, feel free to go as high as 1/250th. If not, 1/60th would suffice to create a decent image. Of course, you can also choose a slower setting. But remember that time is of the essence when shooting bubbles. If you go too slow, the soap bubbles might not even be there by the time you finish the exposure. As for the ISO, it’s best to stick between 100 to 800. If your light source is bright enough, use 100 to prevent image noise. However, if your light’s not as powerful, you’ll have to compensate by using a higher value. Just try not to go beyond 800 to keep your photo noise-free.
3. Start Blowing Bubbles
Once everything is ready, you can now officially begin your bubble photography project. First, pour your solution into a shallow bowl or even a small bottle cap (depending on how big you want your bubble). Then, place it in the middle of your tabletop studio. As soon as your camera is all set up, start blowing bubbles with a straw and take photos. To create soapy spheres, stir the solution with the straw. Then, place it right in the middle of the bowl and blow. It will take a few tries, but you’ll eventually create the ideal bubble. If you see tiny bubbles forming, pierce them with a pin or re-stir the solution. Otherwise, they’ll cling on to the main bubble and burst it. Some bubbles last for just a few seconds, while others can last for a little more than a minute. Since you don’t know how long it will take before they burst, take photos right away.
2. Experiment With Different Lighting
There are many ways to configure your lighting for your soap bubble photos. The easiest is setting it up at a 45-degree angle from the bowl. Since it illuminates the subject from the side, it creates shadows that add dimension to your image. However, if you want to light up the entire sphere, then place your light source directly above it. To ensure proper exposure, place your light source a few inches from the bubble. Also, remember that the excess heat coming from the lamp causes the bubble to burst easily. Therefore, you should only turn it on when you’re ready to shoot.
1. Use Burst Mode
To make sure you get a cool picture of bubbles, consider using Burst Mode. This useful feature allows you to shoot continuously as long as your finger is pressing the button. Some cameras let you take a series of photos automatically. However, if yours doesn’t, you can either turn on Burst Mode by flicking a knob or by accessing it through the menu. Feel free to consult your manual if you don’t know where to find it. For Burst Mode to work efficiently, you’ll need to use a relatively fast shutter speed (at least 1/60th). If one exposure takes a few seconds, your bubble will have already burst by the time the camera is ready for another photo. It’s also essential to find out your camera’s frame rate. While expensive options can take 24 frames per second, others can only take about five frames per second. Of course, the faster your device can shoot, the more images it will produce.
Conclusion
Apart from setting up your desktop studio, the rest of the process is relatively easy. It takes a bit of patience getting the perfect bubble, though. But don’t worry, you’ll get used to doing it after a while. Just have fun and experiment with different ways of taking pictures of bubbles. You even have the option to do it outside if you want. Although you’ll have to deal with more variables, you can still end up with endlessly surprising results.
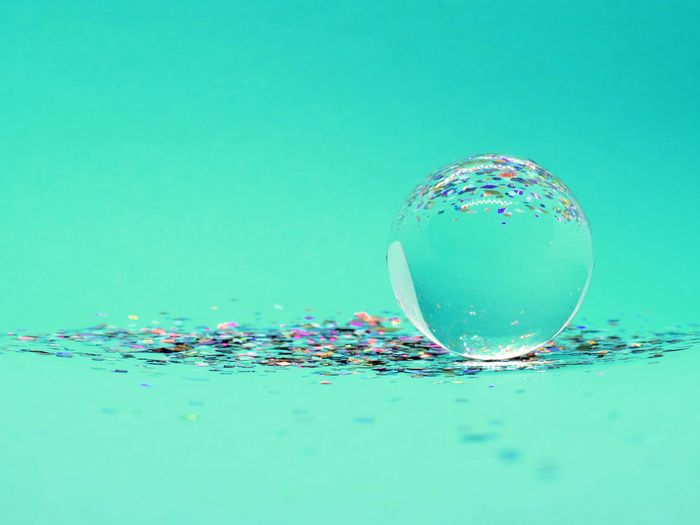
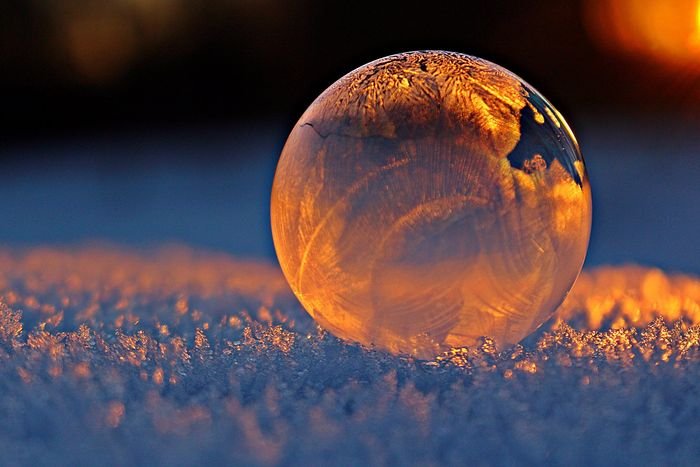
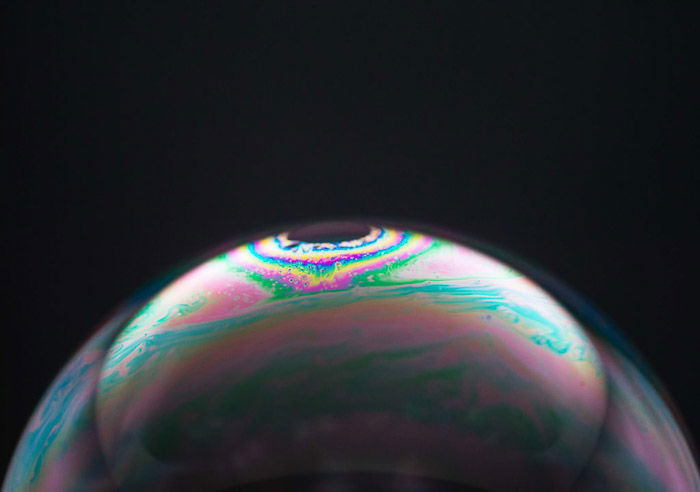
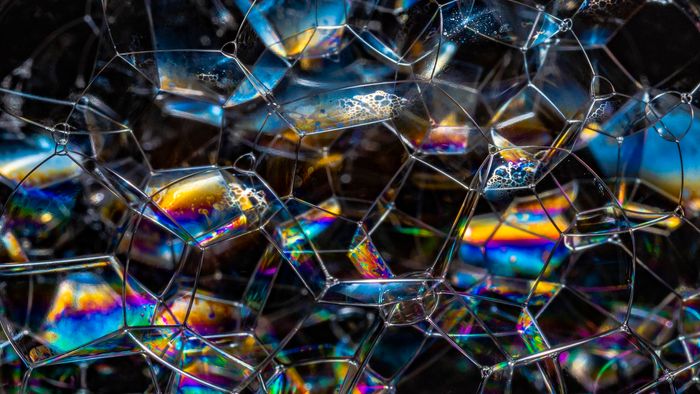
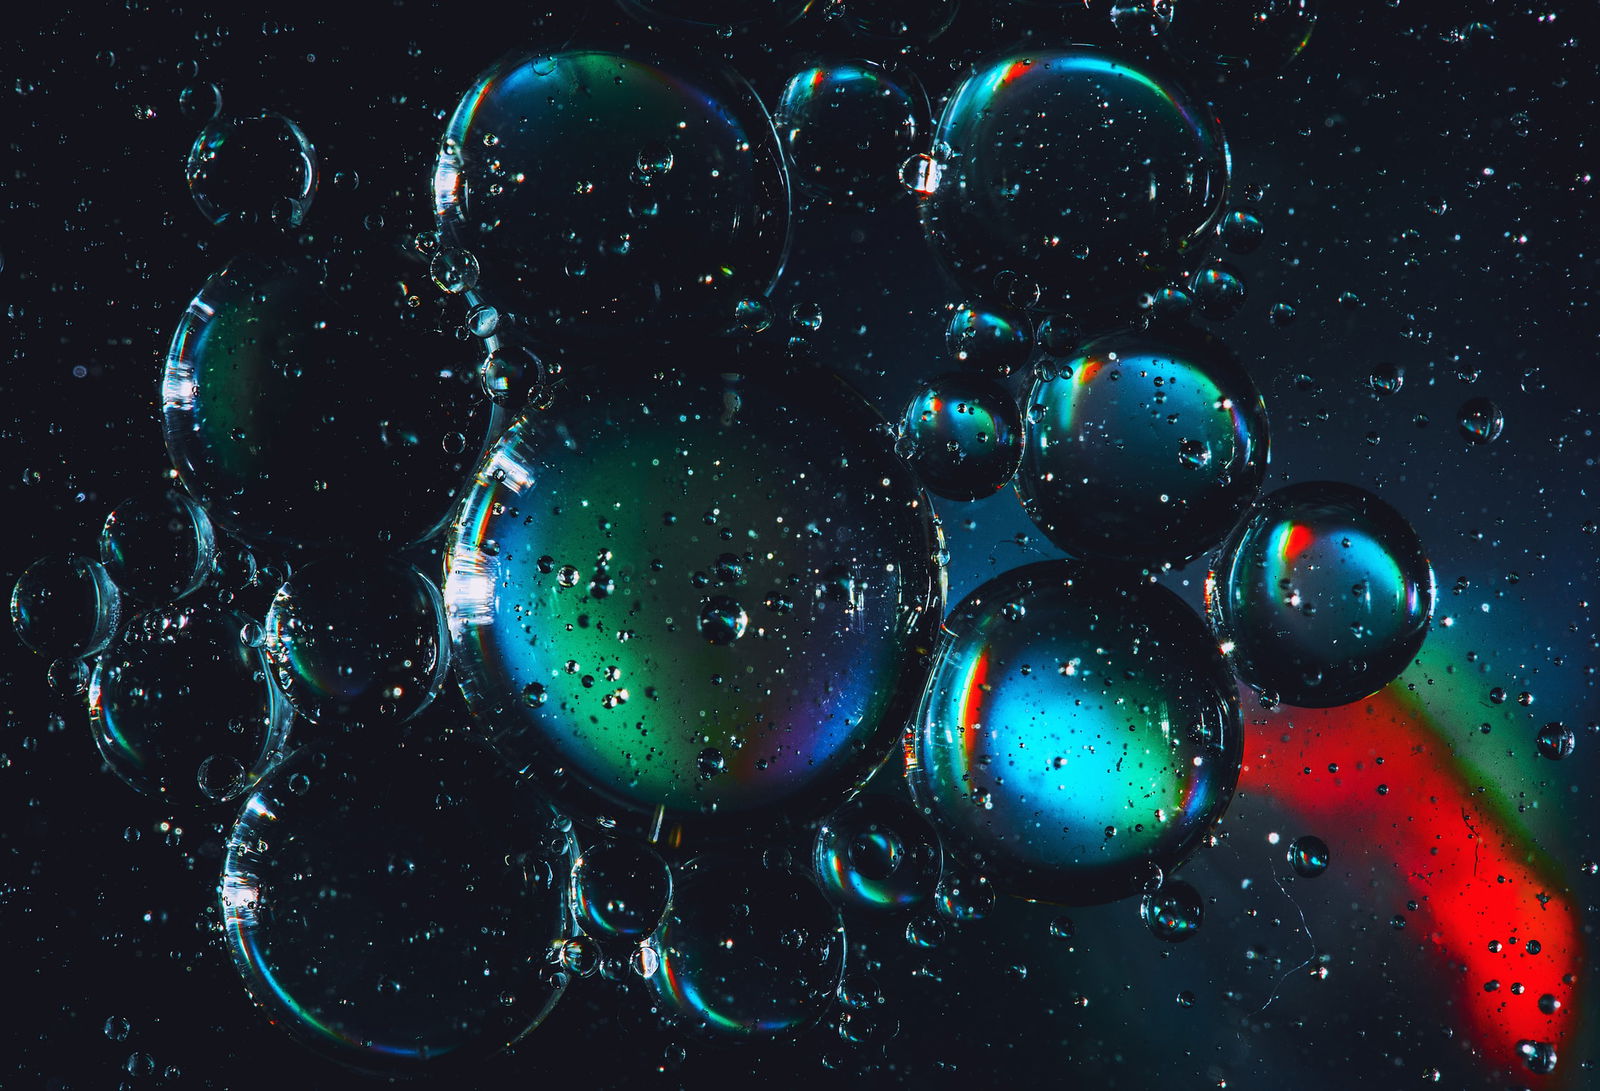
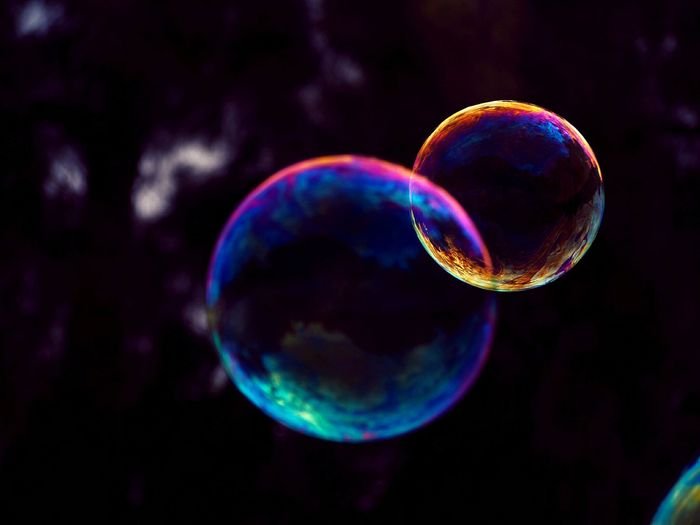
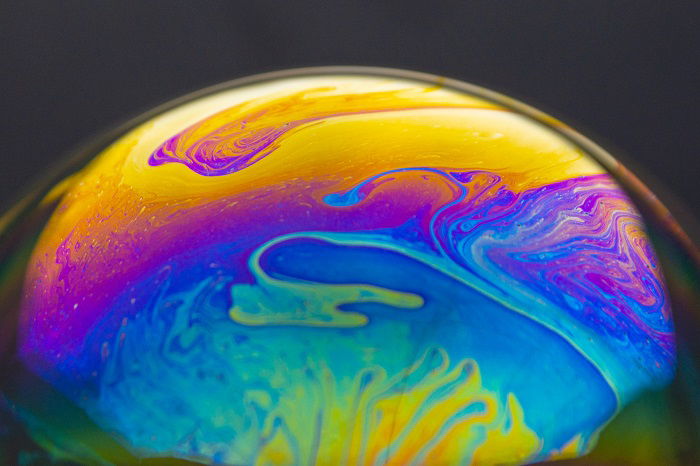
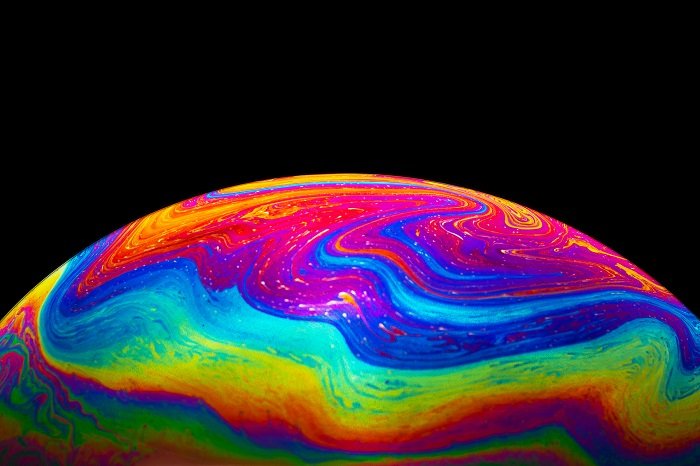
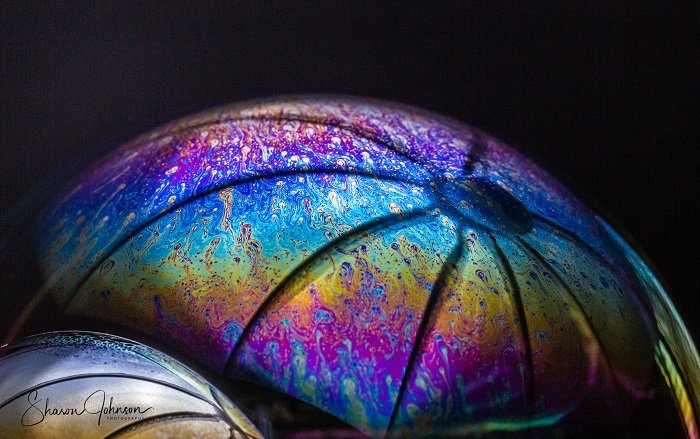
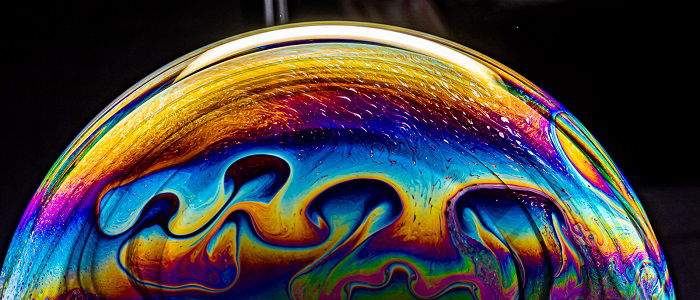
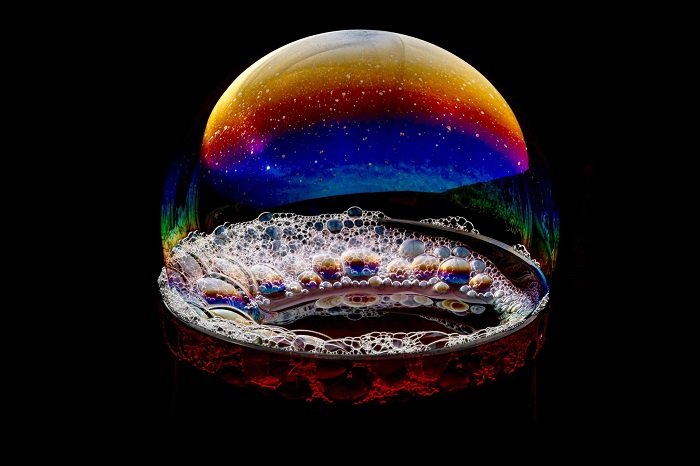
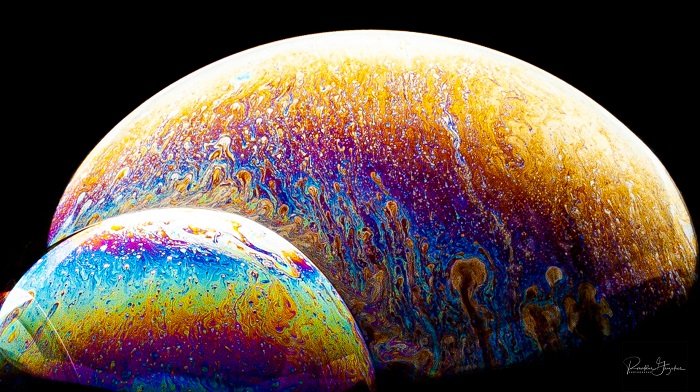
Examples of Bubble Photography
Bubble photography is one of the topics we cover in our creative photography course, Wow Factor Photography. Below are some of the photos taken by our students. If you’d like to learn more, check out the course here. And don’t forget to watch our awesome video too!