Most people use Photoshop for this, but GIMP is a great alternative if you are looking for a free program. We’ll show you how to cut out an image and remove the background with GIMP in just seven steps!
How to Cut Out An Image in Gimp
How to Cut Out an Image in GIMP
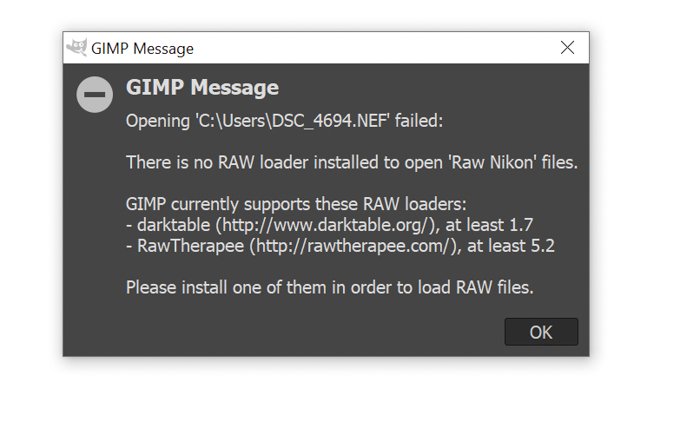
Step 1. Open Your Image
Open your image by dragging it from your desktop into the program. Be aware that GIMP doesn’t support RAW files. If you want to open a RAW file, you will get a notification that you have to install and use a RAW loader first. The programm currently supports darktable and RawTherapee raw loaders.
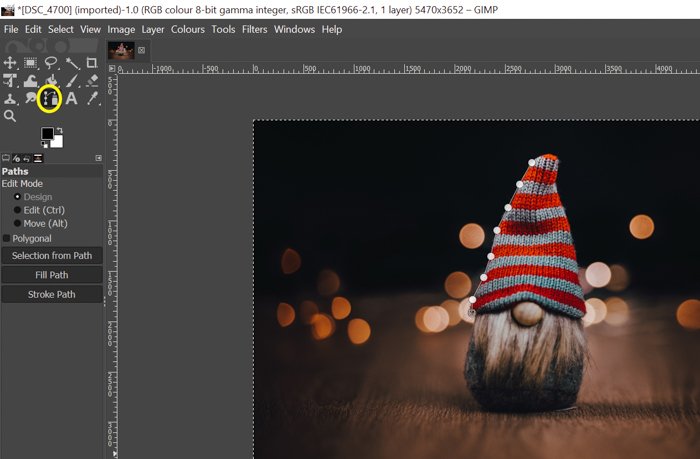
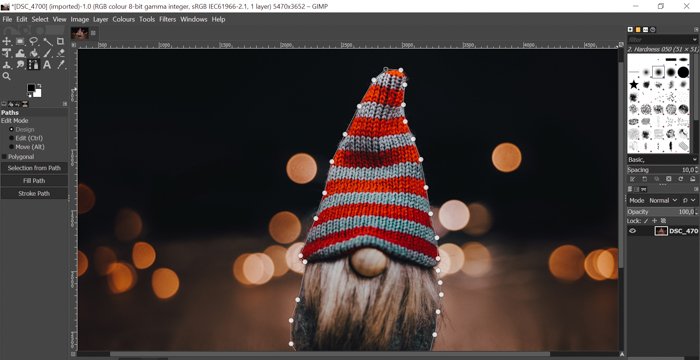
Step 2. Use the Path Tool
You will need to make a path around your subject. To do so, select the Path tool on the sidebar on the left. After this, start putting anchors around the subject. Anchors are small circles connected by white lines. These lines give you the edge of the selection and it is where the cutting will be done.
Make sure you place your anchors carefully and precisely. You can adjust the anchors by dragging and moving them where needed. Once the path is drawn, press CTRL and click on the first anchor. This way, the program will connect the first and last dot around your subject.
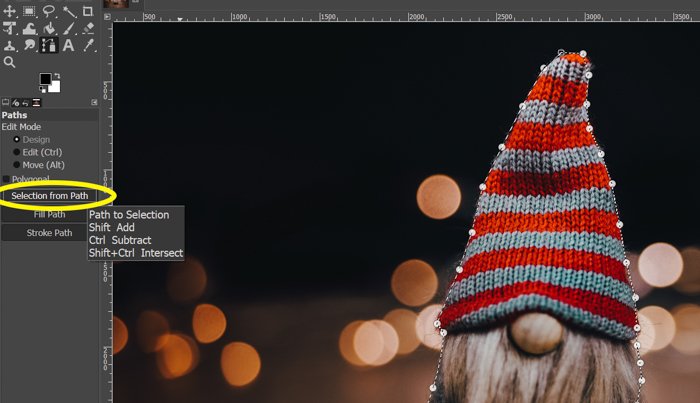
Step 3. Create a Selection
To be able to make adjustments to the subject, you need to convert the path into a selection. On the left sidebar, click “Selection from Path.” You will know that the conversion has been successful once the continuous lines turn scattered.
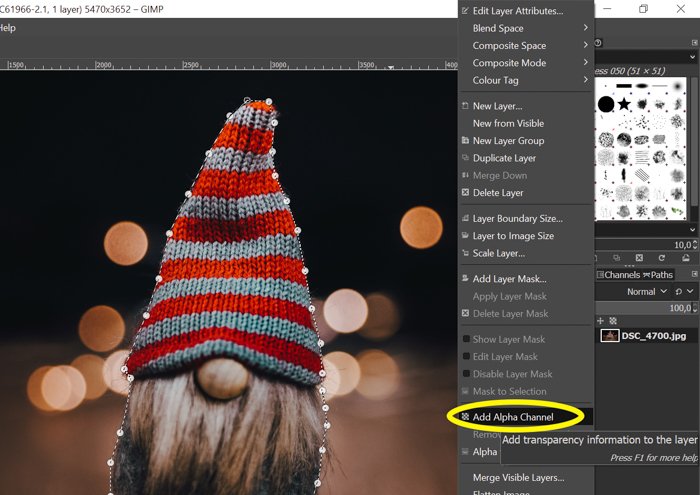
Step 4. Create an Alpha Channel
An alpha channel will make it possible for you to have a transparent background. To reach this, right-click on the layer you are using and click “Add Alpha Channel.”
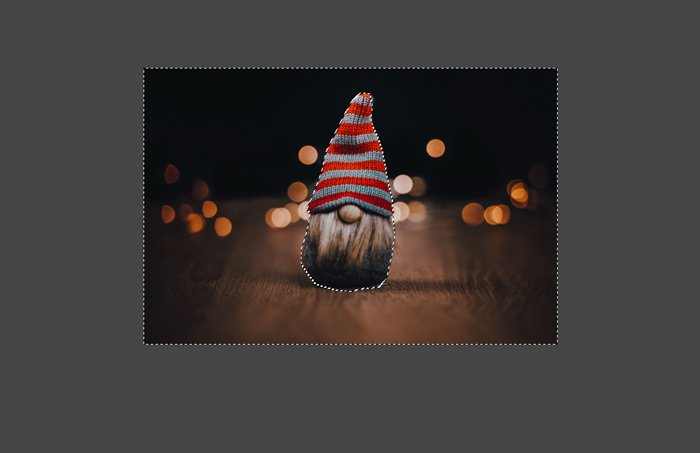
Step 5. Invert Selection
You need to have the background selected instead of the subject. Press CTRL + I to invert the selection. You will see the outlines of the pictures being selected as well.
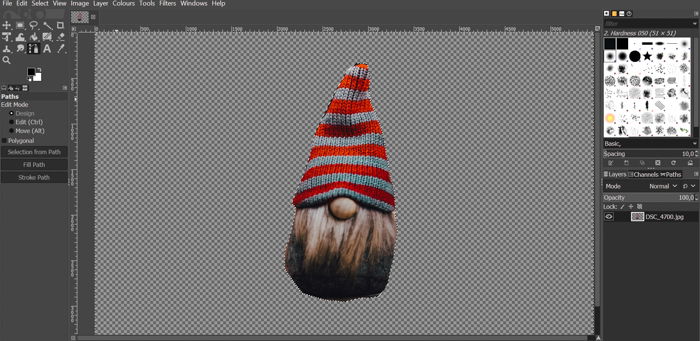
Step 6. Delete the Background
After inverting the selection, you can remove the selected area by pressing Delete on your keyboard. You will see the transparent checkerboard background. If you hadn’t created an alpha channel previously, the background would be white instead of transparent.
Step 7. Erase the Unnecessary Parts
You may have accidentally selected too much, or you may want to erase some parts of the subject. You can fix your mistakes with the Eraser tool. If you want softer edges, change the size, opacity and hardness of the eraser on the left sidebar. The lower the opacity and hardness are, the softer your eraser tool will be.
How to Paste an Image Into Another Image
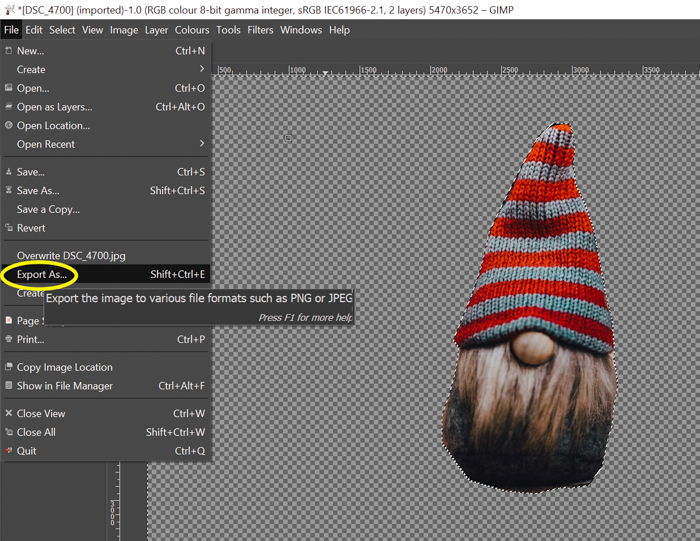
Once you have your subject with a transparent background, you can use GIMP to paste it into any other image. To do this, first, you need to save the current photo with the transparent background. Go to “File” in the upper-left corner and select “Export as.”
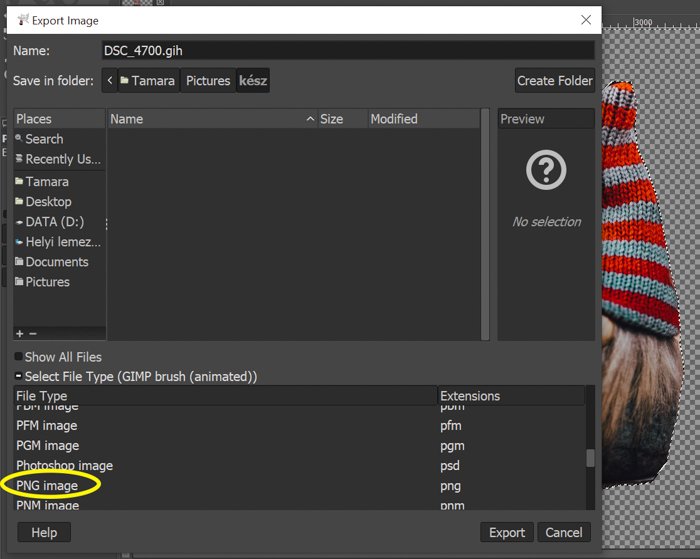
Click “Select file type.” Choose PNG image, because .png is the extension that saves your photos with a transparent background. Click “Export” to save the image.
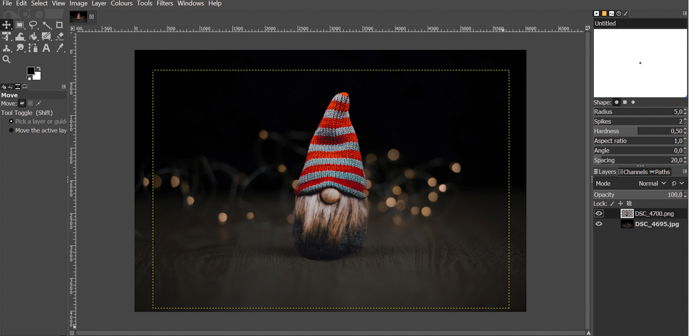
Now all you need to do is open the image you want to paste the previous photo into. In my example, it will be a darker version of the original background. Drag the saved photo into the other image. If you saved it correctly, the subject should appear on the other photo without a background.
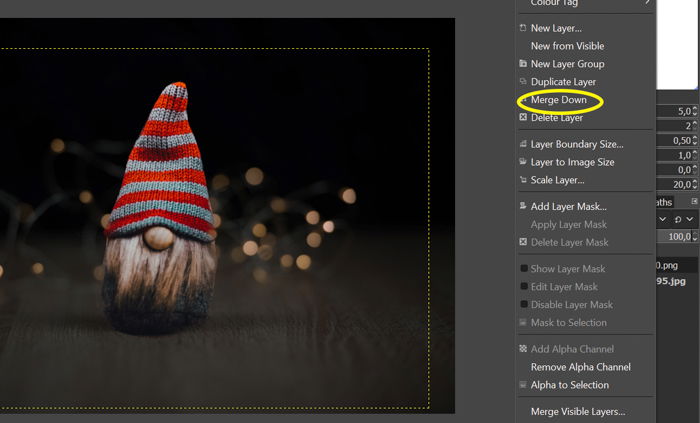
You have to merge the layers before saving the image. Right-click on the upper layer and click “Merge down.” After this, you can save your final photo in any format.
Conclusion
You can cut out part of an image and paste it into another photo by using GIMP. You can also use this programme if you want to make a transparent or white background. Follow this article next time you need to remove a background in GIMP! You can also learn how to edit with our Effortless Editing with Lightroom course!

title: “How To Cut Out An Image In Gimp Step By Step " ShowToc: true date: “2023-01-11” author: “Robert Smith”
Most people use Photoshop for this, but GIMP is a great alternative if you are looking for a free program. We’ll show you how to cut out an image and remove the background with GIMP in just seven steps!
How to Cut Out An Image in Gimp
How to Cut Out an Image in GIMP
Step 1. Open Your Image
Open your image by dragging it from your desktop into the program. Be aware that GIMP doesn’t support RAW files. If you want to open a RAW file, you will get a notification that you have to install and use a RAW loader first. The programm currently supports darktable and RawTherapee raw loaders.
Step 2. Use the Path Tool
You will need to make a path around your subject. To do so, select the Path tool on the sidebar on the left. After this, start putting anchors around the subject. Anchors are small circles connected by white lines. These lines give you the edge of the selection and it is where the cutting will be done.
Make sure you place your anchors carefully and precisely. You can adjust the anchors by dragging and moving them where needed. Once the path is drawn, press CTRL and click on the first anchor. This way, the program will connect the first and last dot around your subject.
Step 3. Create a Selection
To be able to make adjustments to the subject, you need to convert the path into a selection. On the left sidebar, click “Selection from Path.” You will know that the conversion has been successful once the continuous lines turn scattered.
Step 4. Create an Alpha Channel
An alpha channel will make it possible for you to have a transparent background. To reach this, right-click on the layer you are using and click “Add Alpha Channel.”
Step 5. Invert Selection
You need to have the background selected instead of the subject. Press CTRL + I to invert the selection. You will see the outlines of the pictures being selected as well.
Step 6. Delete the Background
After inverting the selection, you can remove the selected area by pressing Delete on your keyboard. You will see the transparent checkerboard background. If you hadn’t created an alpha channel previously, the background would be white instead of transparent.
Step 7. Erase the Unnecessary Parts
You may have accidentally selected too much, or you may want to erase some parts of the subject. You can fix your mistakes with the Eraser tool. If you want softer edges, change the size, opacity and hardness of the eraser on the left sidebar. The lower the opacity and hardness are, the softer your eraser tool will be.
How to Paste an Image Into Another Image
Once you have your subject with a transparent background, you can use GIMP to paste it into any other image. To do this, first, you need to save the current photo with the transparent background. Go to “File” in the upper-left corner and select “Export as.”
Click “Select file type.” Choose PNG image, because .png is the extension that saves your photos with a transparent background. Click “Export” to save the image.
Now all you need to do is open the image you want to paste the previous photo into. In my example, it will be a darker version of the original background. Drag the saved photo into the other image. If you saved it correctly, the subject should appear on the other photo without a background.
You have to merge the layers before saving the image. Right-click on the upper layer and click “Merge down.” After this, you can save your final photo in any format.
Conclusion
You can cut out part of an image and paste it into another photo by using GIMP. You can also use this programme if you want to make a transparent or white background. Follow this article next time you need to remove a background in GIMP! You can also learn how to edit with our Effortless Editing with Lightroom course!
