What Are the Benefits of Understanding Astrophotography Composition?
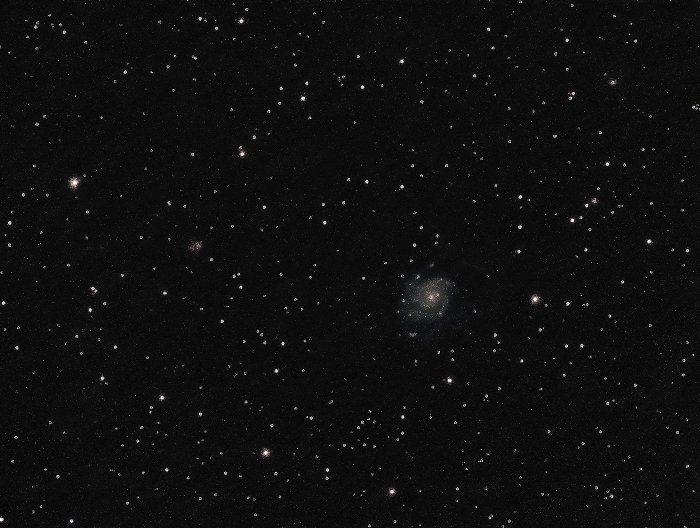
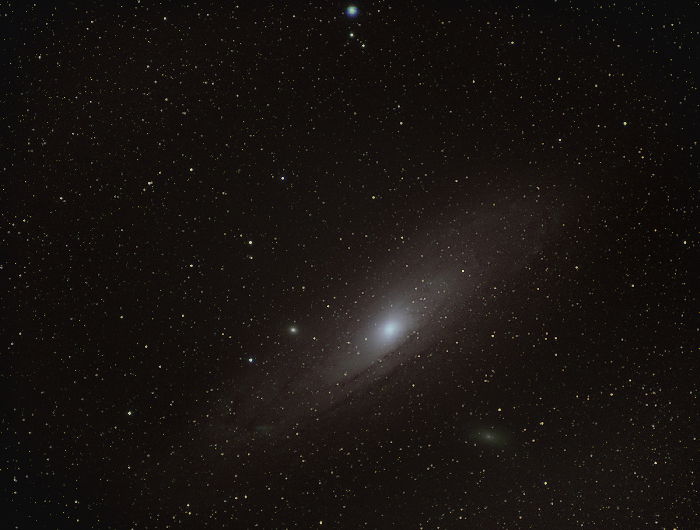
Astrophotography refers to photographing either distant galaxies and nebulae, or the moon and planets. It is also a very technical kind of photography. Composition is not high on the astrophotographer’s to-do list. There’s a problem with that. An astrophotography target can be a great challenge for the photographer. But for the viewer, it’s a little speck of light in the middle of an empty, uninteresting dark frame. The galaxy below is small and faint. This image made me proud as an astrophotographer on a budget. But I have to admit that to a viewer it does not say much. The first thing to do is to assume that the viewer doesn’t know anything about the target. Or about the effort the photographer put into getting the image. Nor are they familiar with the technicalities and problems the photographer had to face. So, what to do to let the public appreciate your astrophotography? Compose according to the size of your target.
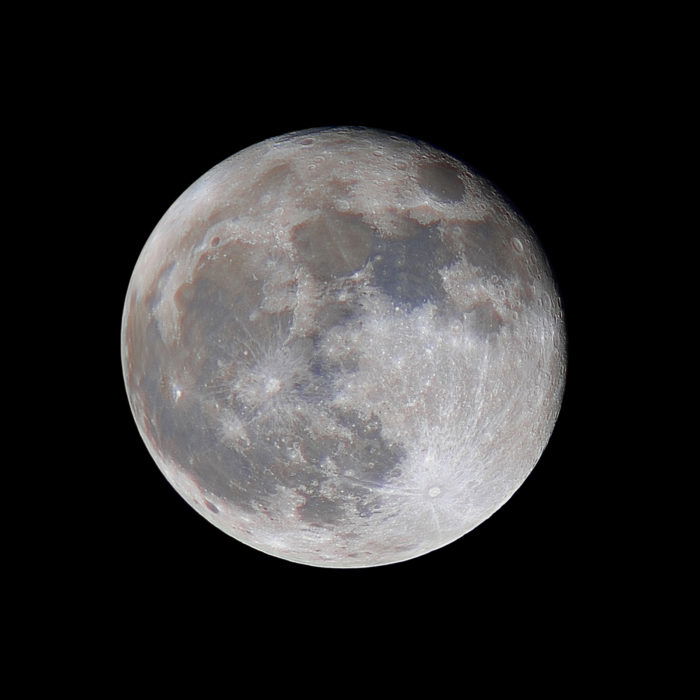
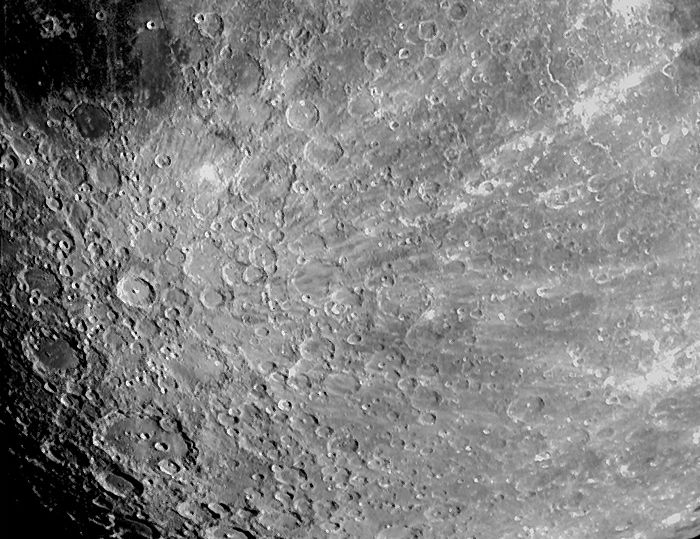
6. Tight Composition On Large Targets
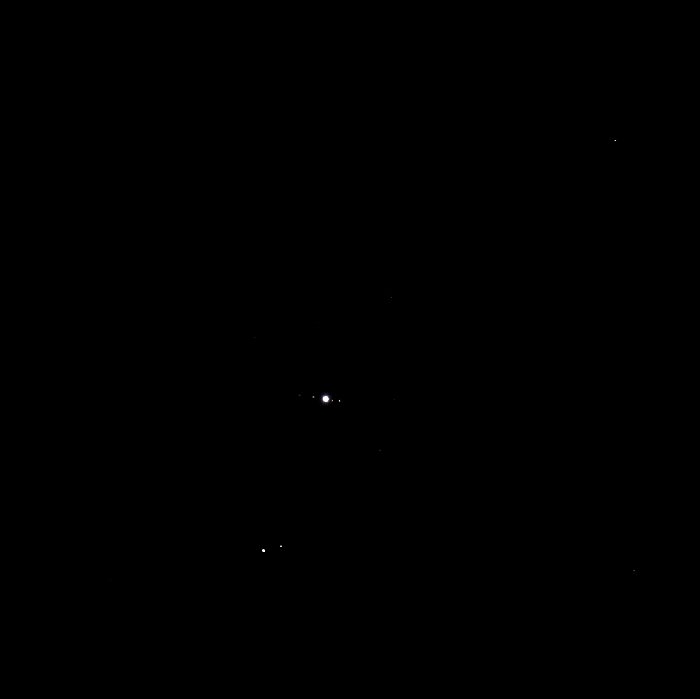
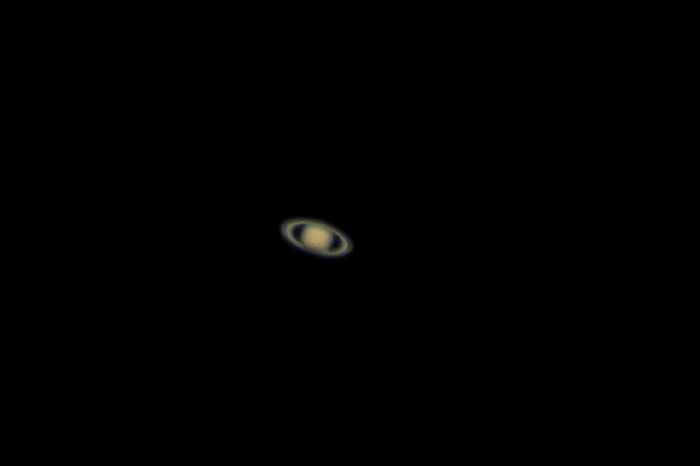
If you are aiming at a single target, this should be bigger with plenty of details and colors. A small speck of light lost in the dark is not compelling. Do your best to fill the frame. Or have a large enough target to show a good amount of details and colors. That is usually enough to awe your audience. You can only do this if you own an equatorial tracking mount. This could be the Skywatcher Star Adventurer or better. Another option is to become a member of an association that allows you to use their telescopes remotely. The Italian club Astra Telescopi Remoti offers this option. To a get a tight composition you can use a long telephoto lens (200-600mm) or telescopes. Or you can crop the image in post. Either way, you should pick a large and bright object to begin with. There is no shortage of such targets in the sky. The most notable example is the moon. But there are plenty of other sky objects you can photograph with standard telephoto lenses. These include the Andromeda Galaxy, the Great Orion Nebula, Pleiades, California Nebula, etc. Without a telescope, you can get some “scientifically” interesting images of Jupiter. You can show four Galilean Moons, or resolve double stars. But these won’t be very exciting for a viewer. The Skywatcher Skymax 90 is a modest, entry-level telescope. It can produce much more interesting images of planets. Particularly of the largest ones: Jupiter and Saturn. Saturn is still small in the frame below. But it has enough details to capture the viewer’s attention. And the dark sky will make them think of the vastness of the Universe. Detailed images of planets are out of the reach of telephoto lens. But they can capture the moon in full, with great details. Center the moon in the frame and crop it down to a square image. This reduces the pitch black sky around it. Again, a telescope allows you to close in on the lunar surface. If you want, you can use classic composition rules (e.g., the rule of thirds). Try these on the most prominent features on the lunar surface.
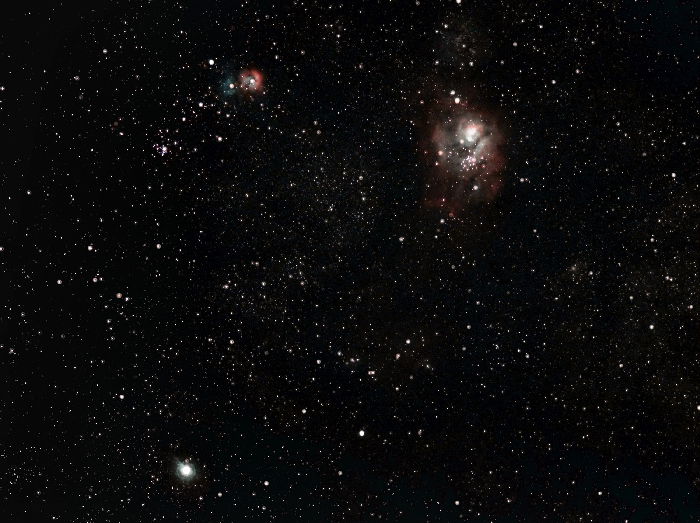
5. Make Use of Wide Composition to Capture Interesting Star Fields
Sometimes your target won’t have a strong enough presence in the frame. Go for a wider composition and include other objects instead. The best and richer star fields are found in the direction of the Milky Way. These include the areas around the Deneb and Sadr stars in the Cygnus constellation. Or more towards the galactic core. More toward the galactic core, there is the star field of the Lagoon and Trifid nebula. You can photograph this with a 200mm. It has plenty of interesting objects and colorful dust clouds. If you are photographing from a fixed tripod, you are limited in the length of your exposure by the star movements. Use the 500-rule to determine the appropriate shutter speed. And use a wide angle lens to get the longest possible exposures.
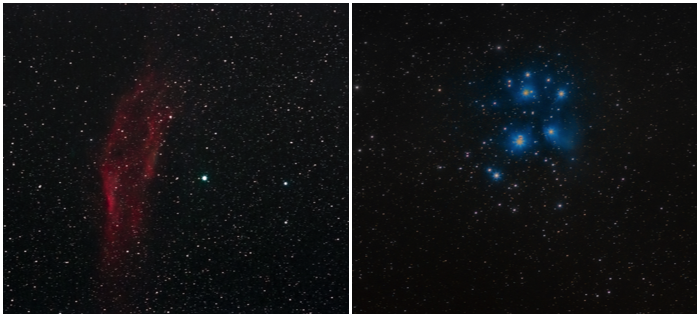
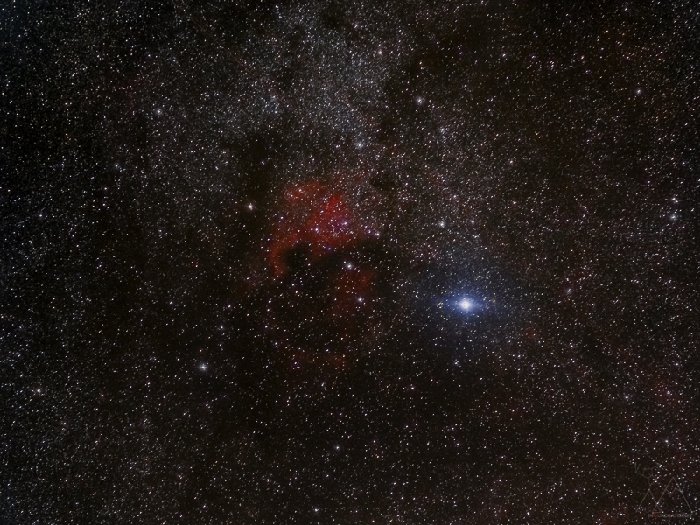
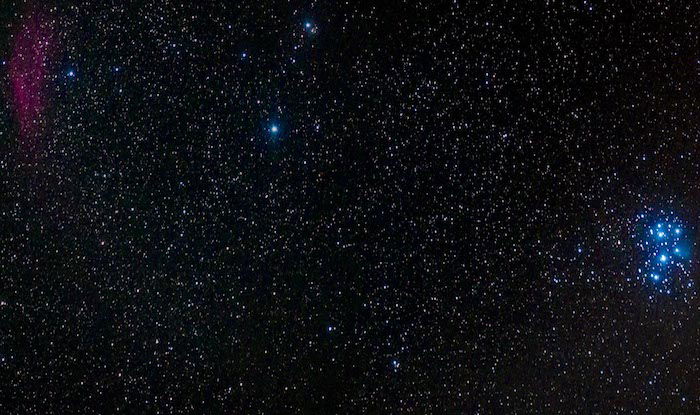
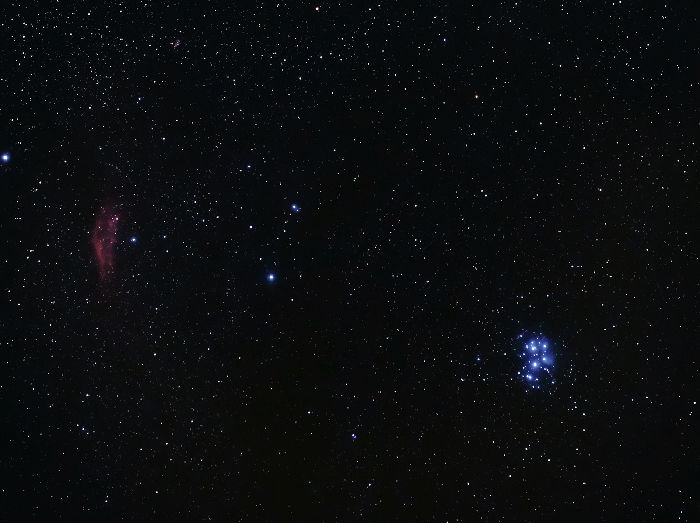
4. Why You Should Shoot Wide And Compose Later In Post
As a rule of thumb, shoot a bit wider than what you would like to. Stacking and other editing processes may force you to crop down your image. You don’t want to end up cutting into your target. Consider the star filed including the Pleiades and the California Nebula. Those are two easy targets you can photograph from a fixed tripod. In my first image of those targets, I used too long a focal length. I ended up with the Pleiades and the nebula right at the edge of the frame. And I even lost the upper part of the California Nebula. By using a shorter focal length you will be sure to have enough space left around the targets. The editing process won’t force you to crop out parts of them. If there is too much empty space at the edges, you can always crop to get a better composition.
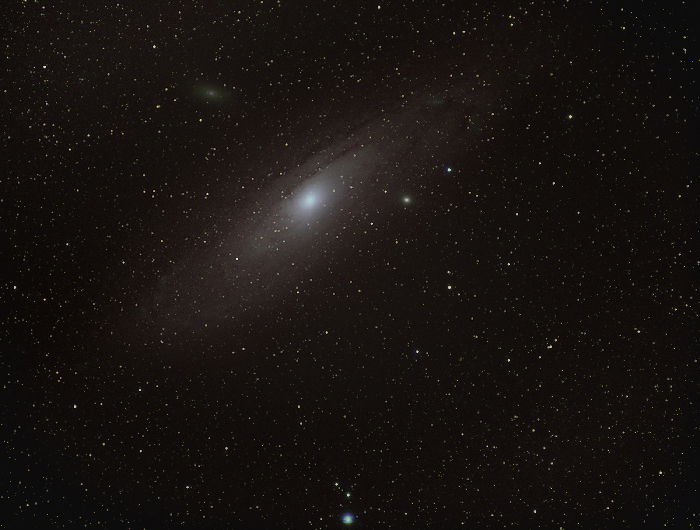
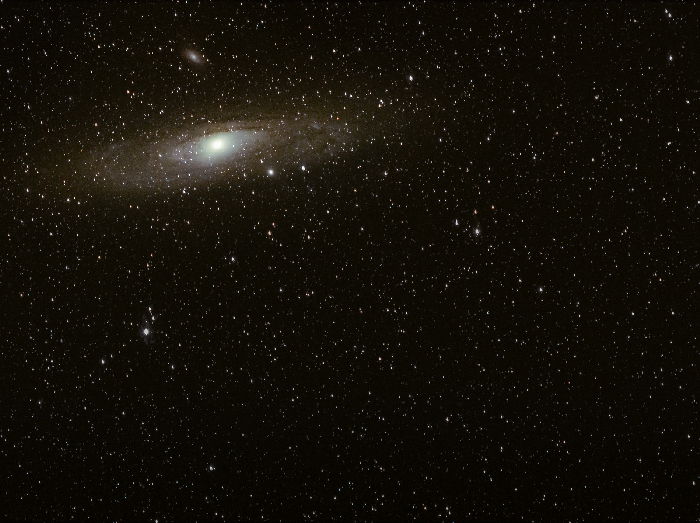
3. Rotate and Flip the Image to Add a 3D Look to Your Target
This one is weird but it works particularly well with Andromeda. We are used to interpreting images based on their contrast. This is particularly relevant when it comes to “creating” 3D interpretations of 2D images. Consider this image of Andromeda. The galaxy has a good size, as well as the two satellite galaxies. These are M110, the puffy cloud above Andromeda, and M32, the bright dot at the edge of the bottom part of Andromeda. We also see a good deal of details, with some dust lanes. This is my best image of Andromeda so far. But what happens when I flip the image horizontally and vertically? In this new orientation, those dust lanes make the image appear three dimensional. The galaxy is much more appealing. There are no obvious up, down, left and right directions in astrophotography. You can always flip and rotate your image to see if you can trick your brain to “see” more.
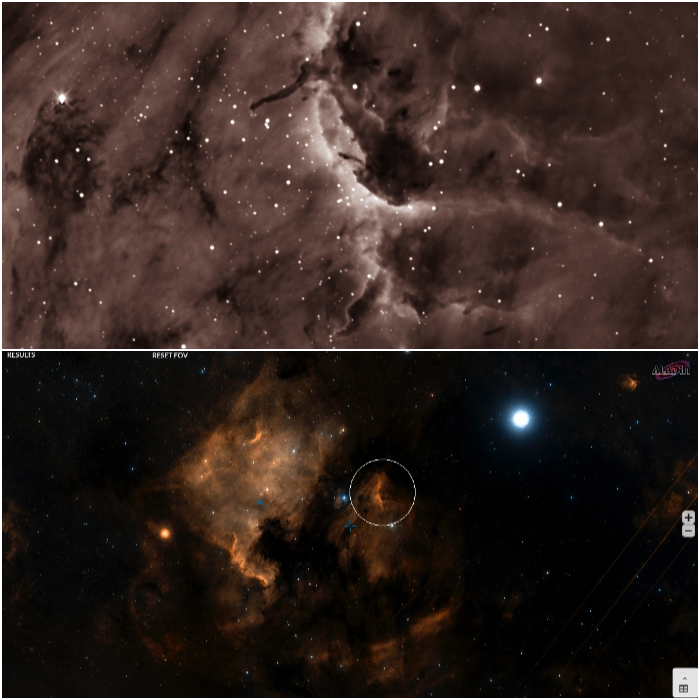
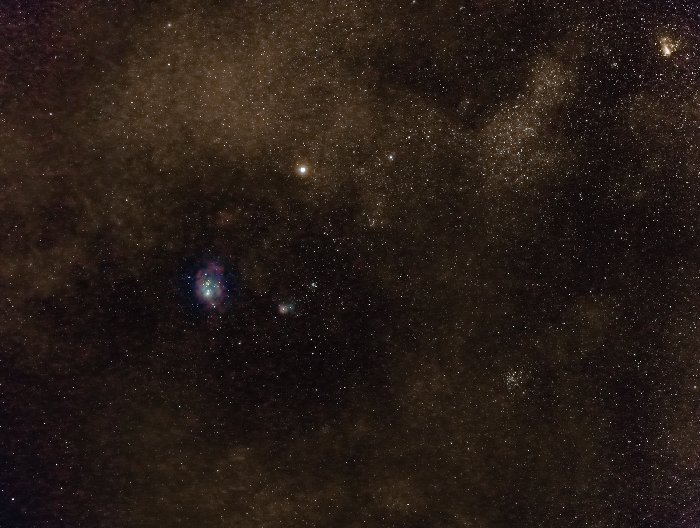
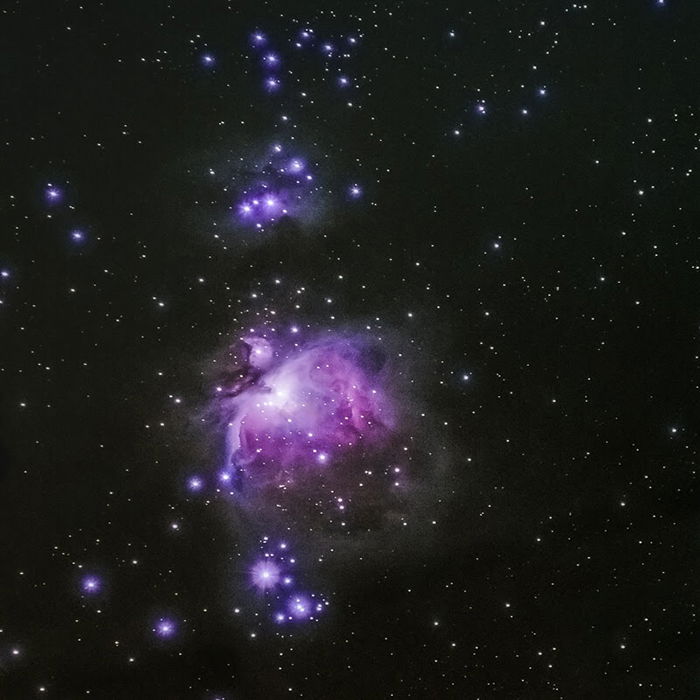
2. Use Classic Composition Rules (Rule of Thirds) to Improve Your Astrophotography
With large targets I prefer a simple square crop with the main subject centered in the frame. With larger views of a dominant subject, the rule of thirds works well. You can see this in this second image of the Great Orion Nebula.
1. How to Use Content-Aware to Fix Composition Problems
Getting the composition right in camera is almost impossible in astrophotography. The target is barely visible in your LCD screen. Stacking will produce low quality edges you should crop away. Light pollution and light gradient may force you to crop even more into the central part of the frame. And so on. More often than not, you might not get what you planned for. You might find your target sitting too close to the edges of your frame, as in my first ever image of Andromeda, shown below. I wanted to go for a classic rule of thirds but I missed it. After correcting the yellow color cast, I composed for the rule of thirds. I used the crop tool to place Andromeda in the right place. Then I let the content-aware function fill in the missing part of the frame. And this is the final result. Use the same technique to balance an image that is not wide enough. This can be because you didn’t have a wide enough lens (and zooming with your feet is not an option here). In this image of the Milky Way, Andromeda sits too close to the bottom edge of the frame. Unfortunately, I could not go wider. I was already at the shortest focal length available on my camera. The crop tool with content-aware allows me to extend my frame. I can have Andromeda in a better position and make it easier to spot. While not scientifically accurate, the resulting images are more pleasant. And the content aware tool works well with the starry sky.
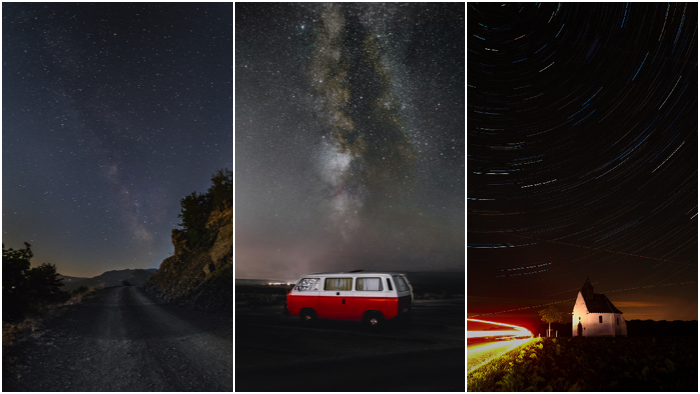
Conclusion
Composition rules in general aim to create a better image. You take into account the subject, symmetry, guiding lines and proportions. You can apply these composition rules to starry landscapes and star trails photography. These two photography types fall under the astrophotography umbrella. But they are not at the core of it. When it comes to astrophotography composition, make use of the classic rules. Use a tight crop on large targets, stay wide on smaller ones to get more of them in the frame. Make use of the content-aware tool in Photoshop to correct and improve the composition. And aim for a strong foreground when photographing starry landscapes and star trails. That’s it. Astrophotography composition in 6 easy steps. We have a post on best apps for astrophotography or milky way photography to check out next!
title: “6 Must Know Astrophotography Composition Tips” ShowToc: true date: “2023-01-09” author: “Deana Padilla”
What Are the Benefits of Understanding Astrophotography Composition?
Astrophotography refers to photographing either distant galaxies and nebulae, or the moon and planets. It is also a very technical kind of photography. Composition is not high on the astrophotographer’s to-do list. There’s a problem with that. An astrophotography target can be a great challenge for the photographer. But for the viewer, it’s a little speck of light in the middle of an empty, uninteresting dark frame. The galaxy below is small and faint. This image made me proud as an astrophotographer on a budget. But I have to admit that to a viewer it does not say much. The first thing to do is to assume that the viewer doesn’t know anything about the target. Or about the effort the photographer put into getting the image. Nor are they familiar with the technicalities and problems the photographer had to face. So, what to do to let the public appreciate your astrophotography? Compose according to the size of your target.
6. Tight Composition On Large Targets
If you are aiming at a single target, this should be bigger with plenty of details and colors. A small speck of light lost in the dark is not compelling. Do your best to fill the frame. Or have a large enough target to show a good amount of details and colors. That is usually enough to awe your audience. You can only do this if you own an equatorial tracking mount. This could be the Skywatcher Star Adventurer or better. Another option is to become a member of an association that allows you to use their telescopes remotely. The Italian club Astra Telescopi Remoti offers this option. To a get a tight composition you can use a long telephoto lens (200-600mm) or telescopes. Or you can crop the image in post. Either way, you should pick a large and bright object to begin with. There is no shortage of such targets in the sky. The most notable example is the moon. But there are plenty of other sky objects you can photograph with standard telephoto lenses. These include the Andromeda Galaxy, the Great Orion Nebula, Pleiades, California Nebula, etc. Without a telescope, you can get some “scientifically” interesting images of Jupiter. You can show four Galilean Moons, or resolve double stars. But these won’t be very exciting for a viewer. The Skywatcher Skymax 90 is a modest, entry-level telescope. It can produce much more interesting images of planets. Particularly of the largest ones: Jupiter and Saturn. Saturn is still small in the frame below. But it has enough details to capture the viewer’s attention. And the dark sky will make them think of the vastness of the Universe. Detailed images of planets are out of the reach of telephoto lens. But they can capture the moon in full, with great details. Center the moon in the frame and crop it down to a square image. This reduces the pitch black sky around it. Again, a telescope allows you to close in on the lunar surface. If you want, you can use classic composition rules (e.g., the rule of thirds). Try these on the most prominent features on the lunar surface.
5. Make Use of Wide Composition to Capture Interesting Star Fields
Sometimes your target won’t have a strong enough presence in the frame. Go for a wider composition and include other objects instead. The best and richer star fields are found in the direction of the Milky Way. These include the areas around the Deneb and Sadr stars in the Cygnus constellation. Or more towards the galactic core. More toward the galactic core, there is the star field of the Lagoon and Trifid nebula. You can photograph this with a 200mm. It has plenty of interesting objects and colorful dust clouds. If you are photographing from a fixed tripod, you are limited in the length of your exposure by the star movements. Use the 500-rule to determine the appropriate shutter speed. And use a wide angle lens to get the longest possible exposures.
4. Why You Should Shoot Wide And Compose Later In Post
As a rule of thumb, shoot a bit wider than what you would like to. Stacking and other editing processes may force you to crop down your image. You don’t want to end up cutting into your target. Consider the star filed including the Pleiades and the California Nebula. Those are two easy targets you can photograph from a fixed tripod. In my first image of those targets, I used too long a focal length. I ended up with the Pleiades and the nebula right at the edge of the frame. And I even lost the upper part of the California Nebula. By using a shorter focal length you will be sure to have enough space left around the targets. The editing process won’t force you to crop out parts of them. If there is too much empty space at the edges, you can always crop to get a better composition.
3. Rotate and Flip the Image to Add a 3D Look to Your Target
This one is weird but it works particularly well with Andromeda. We are used to interpreting images based on their contrast. This is particularly relevant when it comes to “creating” 3D interpretations of 2D images. Consider this image of Andromeda. The galaxy has a good size, as well as the two satellite galaxies. These are M110, the puffy cloud above Andromeda, and M32, the bright dot at the edge of the bottom part of Andromeda. We also see a good deal of details, with some dust lanes. This is my best image of Andromeda so far. But what happens when I flip the image horizontally and vertically? In this new orientation, those dust lanes make the image appear three dimensional. The galaxy is much more appealing. There are no obvious up, down, left and right directions in astrophotography. You can always flip and rotate your image to see if you can trick your brain to “see” more.
2. Use Classic Composition Rules (Rule of Thirds) to Improve Your Astrophotography
With large targets I prefer a simple square crop with the main subject centered in the frame. With larger views of a dominant subject, the rule of thirds works well. You can see this in this second image of the Great Orion Nebula.
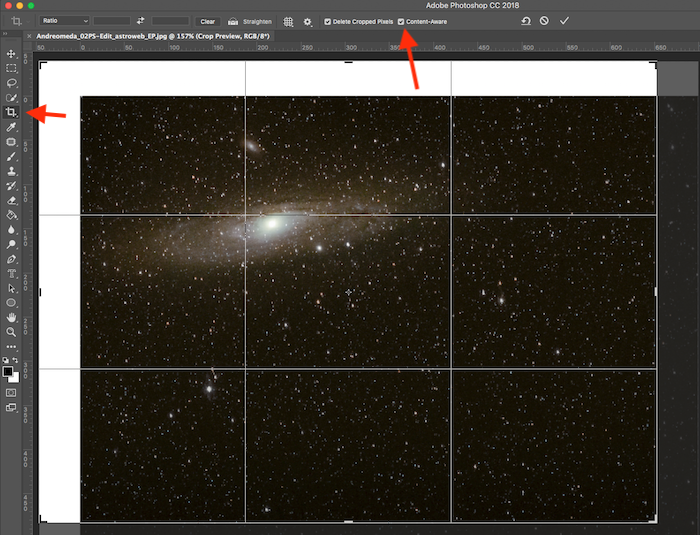
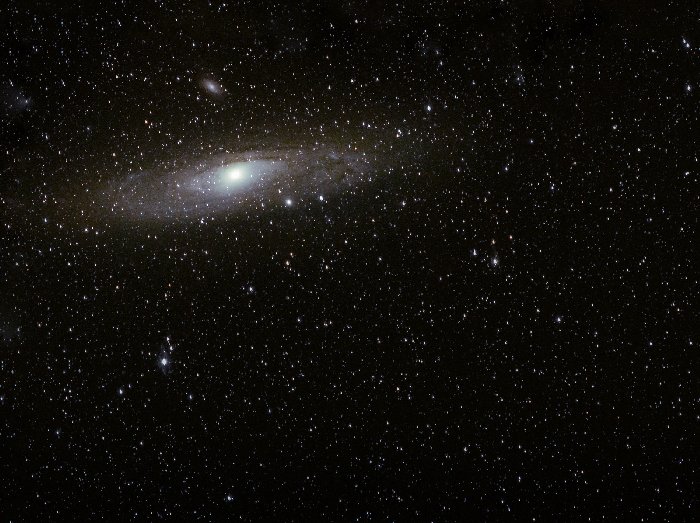
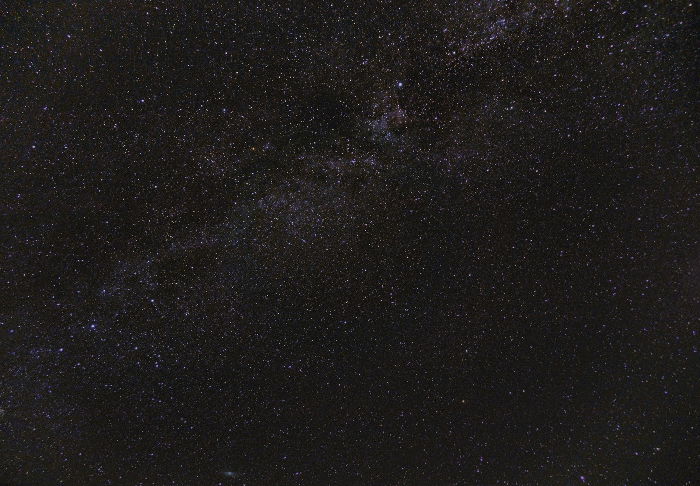
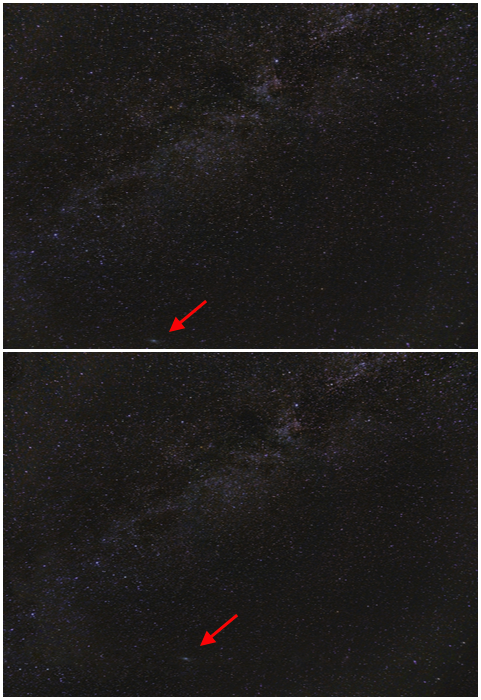
1. How to Use Content-Aware to Fix Composition Problems
Getting the composition right in camera is almost impossible in astrophotography. The target is barely visible in your LCD screen. Stacking will produce low quality edges you should crop away. Light pollution and light gradient may force you to crop even more into the central part of the frame. And so on. More often than not, you might not get what you planned for. You might find your target sitting too close to the edges of your frame, as in my first ever image of Andromeda, shown below. I wanted to go for a classic rule of thirds but I missed it. After correcting the yellow color cast, I composed for the rule of thirds. I used the crop tool to place Andromeda in the right place. Then I let the content-aware function fill in the missing part of the frame. And this is the final result. Use the same technique to balance an image that is not wide enough. This can be because you didn’t have a wide enough lens (and zooming with your feet is not an option here). In this image of the Milky Way, Andromeda sits too close to the bottom edge of the frame. Unfortunately, I could not go wider. I was already at the shortest focal length available on my camera. The crop tool with content-aware allows me to extend my frame. I can have Andromeda in a better position and make it easier to spot. While not scientifically accurate, the resulting images are more pleasant. And the content aware tool works well with the starry sky.
Conclusion
Composition rules in general aim to create a better image. You take into account the subject, symmetry, guiding lines and proportions. You can apply these composition rules to starry landscapes and star trails photography. These two photography types fall under the astrophotography umbrella. But they are not at the core of it. When it comes to astrophotography composition, make use of the classic rules. Use a tight crop on large targets, stay wide on smaller ones to get more of them in the frame. Make use of the content-aware tool in Photoshop to correct and improve the composition. And aim for a strong foreground when photographing starry landscapes and star trails. That’s it. Astrophotography composition in 6 easy steps. We have a post on best apps for astrophotography or milky way photography to check out next!
